Enchanting Floral Gardening: Nature's Palette
  • Flowers & Plants
  • Gardening Knowledge
    • Light
    • Watering
    • Fertilizing
    • Pruning
    • Soil
    • Repotting
    • Temperature
  • Pests & Diseases
  • Flower Fertilizers & Pesticides
  • Gardening Tools
    • Flowerpot
    • Gardening Scissors
    • Gardening Gloves
    • Shovel
    • Watering Can
    • Gardening Stand
No Result
View All Result
Enchanting Floral Gardening: Nature's Palette
No Result
View All Result
Home Watering

Which diy self watering tomato planters are best? See simple designs for big harvests.

bloommelody by bloommelody
2025-05-26
in Watering
0
Which diy self watering tomato planters are best? See simple designs for big harvests.
Share on FacebookShare on Twitter

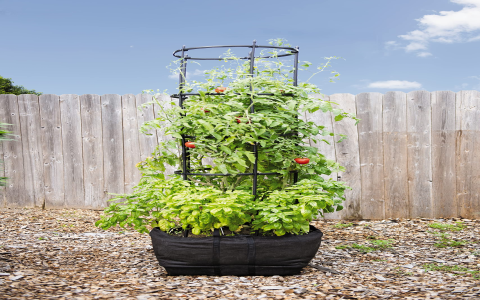
Alright, so I’ve been meaning to share this for a while. It’s about how I finally got around to making my own self-watering tomato planters. You know, I’ve always loved growing tomatoes, but keeping them perfectly watered? That’s another story. Either they’d be bone dry by the end of a hot day, or I’d drown them. There was no in-between, seemed like.

Getting the Idea and Stuff Together

I’d seen those fancy self-watering pots in garden centers, but man, they can be pricey. And I’m the kind of guy who likes to tinker, figure things out. So, I thought, why not try to build my own? It can’t be rocket science, right?

Related articles

britetap chicken waterer: User reviews and tips (What real chicken owners say before you buy one!)

Thinking of visiting Wild Waters Park Ocala? (Here are simple tips to make your day awesome!)

Which diy self watering tomato planters are best? See simple designs for big harvests.

So, first things first, I needed some containers. I went with a couple of those big, sturdy plastic buckets. You can get ’em pretty cheap at most hardware stores. I picked up two for each planter I wanted to make. One for the reservoir, one for the plant.

Then I needed something for the wicking system. This is the part that pulls the water up to the soil. I rummaged around and found some old plastic cups that looked about right to act as a wicking chamber, and some landscape fabric I had leftover from another project. Some folks use PVC pipes or even old soda bottles. I figured the cups and fabric would do the trick.

Putting It All Together – The Nitty Gritty

Okay, so here’s how I did it, more or less. It was a bit of trial and error, but that’s half the fun.

  • Prepping the Buckets: I took one bucket – this would be the outer one, the reservoir. I left it as is. The second bucket, the inner one that holds the soil and plant, needed some work. I drilled a bunch of small holes in the bottom of this inner bucket. This is so the water can eventually get to the soil through the wicking system.
  • Creating the Wicking Chamber: I took one of those plastic cups, cut off the bottom, and then drilled a few holes around its sides. I placed this upside down in the center of the outer bucket. This little chamber is what the inner bucket will sit on, creating a space for the water. It also helps to get the water up into the soil via the wicking material.
  • The Wicking Material: I cut a piece of landscape fabric, big enough to line the bottom of the inner (soil) bucket and drape down through a larger hole I cut in its center, right over where the wicking cup would be. This fabric would draw water up. Some folks pack their wicking chamber with soil, but I wanted to try the fabric extending down.
  • Making an Access Pipe for Water: This was important. I needed a way to get water into the reservoir without flooding the topsoil. I took a piece of scrap plastic pipe, maybe an inch or so wide, and cut it long enough to stick out of the top of the planter when the inner bucket was nested. I drilled a few holes in the bottom end of this pipe. Then, I carefully cut a hole near the edge of the inner bucket, just big enough for this pipe to slide through and reach down into the reservoir space.
  • Assembly: So, I put the wicking cup in the outer bucket. Then I threaded my landscape fabric through the central hole of the inner bucket. I carefully placed the inner bucket into the outer bucket, making sure the fabric tail went down into the wicking cup area. I then slid my watering pipe down through its hole, making sure it reached the bottom reservoir. It sounds more complicated than it was, honestly. It just took a bit of fiddling.

Planting and Watching the Magic

Once the planters were assembled, I filled the inner bucket with a good potting mix. I made sure to pack some soil around the landscape fabric wicking tail to get good contact. Then I transplanted my little tomato seedlings. Gave them a good initial watering from the top, just to settle them in.

Then came the moment of truth: filling the reservoir through the pipe. I poured water in until I saw it just about reach the bottom of the inner bucket (you can usually eyeball this by looking at the small gap between the two buckets if you haven’t sealed it, or just guess).

And you know what? It worked! Over the next few weeks, I noticed the soil stayed consistently moist, but not waterlogged. My tomatoes seemed happier. I wasn’t out there every single day with the hose, second-guessing myself. I’d just top up the reservoir every few days, or even once a week, depending on the heat.

It wasn’t a perfect system, mind you. Sometimes I’d overfill a bit, or wonder if the wicking was really reaching everywhere. But overall, a huge improvement. My tomatoes grew strong, and I actually got a decent harvest without the usual watering stress.

Which diy self watering tomato planters are best? See simple designs for big harvests.

So, yeah, that was my little adventure into DIY self-watering planters. Definitely worth the effort, and I saved a few bucks too. If you’re thinking about it, I’d say give it a go. It’s pretty satisfying to see something you built yourself actually work and help your plants thrive.

bloommelody

bloommelody

Related Posts

britetap chicken waterer: User reviews and tips (What real chicken owners say before you buy one!)

britetap chicken waterer: User reviews and tips (What real chicken owners say before you buy one!)

by nnxt
2025-06-16
0

Figuring Out a Better Way to Water the Flock You know, keeping chickens is mostly fun, but man, the water situation was driving me nuts. I...

Thinking of visiting Wild Waters Park Ocala? (Here are simple tips to make your day awesome!)

Thinking of visiting Wild Waters Park Ocala? (Here are simple tips to make your day awesome!)

by bloommelody
2025-06-10
0

Alright, so I finally got around to checking out Wild Waters Park over in Ocala. Been meaning to go for ages, you know, get away from...

For best results, does propiconazole need to be watered in? Find out the crucial application tip.

For best results, does propiconazole need to be watered in? Find out the crucial application tip.

by bloommelody
2025-05-31
0

Alright, so today I wanted to chat a bit about something that comes up pretty often when you’re trying to sort out your lawn – specifically,...

How to Use Your Trojan Battery Watering System (Unlock Longer Battery Life With These Easy Steps)

How to Use Your Trojan Battery Watering System (Unlock Longer Battery Life With These Easy Steps)

by bloommelody
2025-05-26
0

Alright, so dealing with my bank of Trojan batteries, especially keeping the water levels topped up, used to be a real chore. I mean, who actually...

Searching for a watering can made in usa (We list reliable brands you can trust for your plants)

Searching for a watering can made in usa (We list reliable brands you can trust for your plants)

by nnxt
2025-05-25
0

So, I figured, hey, let me get a decent watering can. Simple, right? And I thought, why not try and find one made right here in...

Next Post
How can you make your personalized gardening gloves truly one-of-a-kind and fun? Easily customize them by adding names, cool initials, or even small pictures.

How can you make your personalized gardening gloves truly one-of-a-kind and fun? Easily customize them by adding names, cool initials, or even small pictures.

Picking the best beach shovel made easy (Your simple guide to the perfect one for sunny beach days)

Picking the best beach shovel made easy (Your simple guide to the perfect one for sunny beach days)

Where to find cool personalised gardening gloves? Check out these top choices for every gardener.

Where to find cool personalised gardening gloves? Check out these top choices for every gardener.

CATEGORIES

  • Fertilizing
  • Flower Fertilizers & Pesticides
  • Flowerpot
  • Flowers & Plants
  • Gardening Gloves
  • Gardening Knowledge
  • Gardening Scissors
  • Gardening Stand
  • Gardening Tools
  • Light
  • Pests & Diseases
  • Pruning
  • Repotting
  • Shovel
  • Soil
  • Temperature
  • Watering
  • Watering Can

RECOMMENDED

Repotting Bamboo: What You Need to Know (Soil, Pots, and More)
Repotting

Repotting Bamboo: What You Need to Know (Soil, Pots, and More)

2025-01-18
Choosing the Right Growing Light Stands for Your Plants
Light

Choosing the Right Growing Light Stands for Your Plants

2024-12-16
Enchanting Floral Gardening: Nature's Palette

Gardening is actually easy

17071874890767616772_3_ainote_new
pexels-david-bartus-43782-714918
roses-bouquet-congratulations-arrangement-68570
pexels-photo-85773
94339887ba0b48118d17e18d1112938b
1704070288593363160_7_ainote_new
Elevating Your Gardening Stand: Cultivating a Sanctuary of Wellness and Harmony
pexels-photo-298246
u=1477108710,1302668665&fm=253&fmt=auto&app=138&f=JPEG
pexels-photo-931179
  • About
  • Advertise
  • Privacy & Policy

© 2025 Bloom Melody - https://www.bloommelody.com

No Result
View All Result
  • Flowers & Plants
  • Gardening Knowledge
    • Light
    • Watering
    • Fertilizing
    • Pruning
    • Soil
    • Repotting
    • Temperature
  • Pests & Diseases
  • Flower Fertilizers & Pesticides
  • Gardening Tools
    • Flowerpot
    • Gardening Scissors
    • Gardening Gloves
    • Shovel
    • Watering Can
    • Gardening Stand

© 2025 Bloom Melody - https://www.bloommelody.com