
Alright folks, gather ’round! Let me tell ya about my weekend project: cultivator shovels. Sounds simple, right? Well, it wasn’t exactly a walk in the park.
It all started when I noticed my garden beds were getting seriously overgrown. Weeds everywhere! I’d been using a regular shovel, but it was clunky and inefficient for getting between the rows of plants. That’s when I thought, “I need something more…specialized.”
First things first, research. I spent a whole evening online, looking at different types of cultivator shovels. Some were tiny hand trowels, others were these massive contraptions you could drag behind a tractor. I needed something in-between – something I could use comfortably while walking between my rows.
Then came the design phase. I sketched out a few ideas on a napkin (yes, a real napkin). I wanted a narrow blade to get close to the plants without disturbing them, and a slightly angled handle for better leverage. I decided to go with a steel blade, because, let’s face it, my soil is rocky as hell.
Next up: Materials! I hit up my local hardware store. Grabbed a steel shovel head (figured I could modify it), a length of steel pipe for the handle, some welding rods, and a few other bits and bobs. The guy at the store gave me a funny look when I told him what I was planning, but hey, gotta respect a DIY spirit, right?
The actual making part. This is where the fun (and the frustration) began. I started by cutting the shovel head down to the size and shape I wanted. Grinding, cutting, sparks flying everywhere! My neighbor probably thought I was building a spaceship.
Welding Time: Then I welded the steel pipe to the shovel head. Let me tell you, my welding skills are… developing. Lots of grinding to smooth out the ugly bits. Safety first, people! Always wear a mask and gloves.
Handle issues:The initial handle angle was all wrong. So I had to cut it off and re-weld it, slightly different angle, took longer than expected, but it finally felt right in my hands.
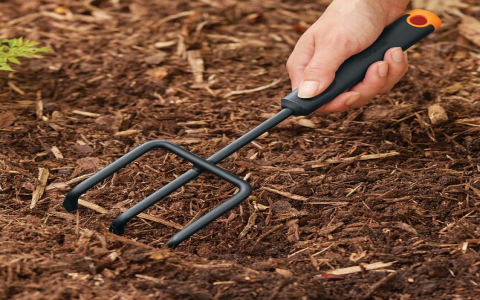
Testing, testing! Once the welding was done and everything was cool, I took my new cultivator shovel out to the garden. Oh man, it was so much better than the regular shovel! I could easily get between the rows, weeding and loosening the soil without disturbing the plants.
Fine-tuning. After using it for a while, I noticed a few things I wanted to tweak. The blade was a little too sharp, so I dulled it down slightly. I also added a rubber grip to the handle for more comfort. Gotta think about those blisters!
- Lesson learned: Measure twice, cut once. Seriously, I wasted a lot of time because I didn’t measure properly the first time.
- Another lesson: Welding is hard. Practice makes perfect, I guess.
All in all, it was a rewarding project. I now have a custom-made cultivator shovel that works perfectly for my garden. Plus, I learned a few new skills along the way. If you’re thinking about making your own tools, I say go for it! It’s a great way to save money, customize your gear, and get your hands dirty. Literally.
So that’s my cultivator shovel story. Hope you enjoyed it! Now, back to the garden!


