
Time for a Change of Scenery
So, I finally got around to repotting that old juniper of mine. You know how it is, you see it needs doing, you think “ah, next weekend,” and suddenly it’s been months. This fella was definitely looking a bit sad, water just zipping straight through the pot, leaves not quite their usual green. Classic signs the soil was spent and the roots were probably having a party where they shouldn’t be. Time for some fresh dirt and a bit more room to breathe.
The Nitty-Gritty: Getting Hands Dirty
First things first, I laid out some old tarp in the yard. I always tell myself I’ll keep it tidy, but let’s be honest, repotting bonsai is a messy business, plain and simple. Got my tools ready: the new pot – just a tad bigger, didn’t want to go crazy – my soil mix, a trusty root hook, sharp cutters, and some wire. I stopped buying those expensive pre-mixed bonsai soils ages ago. Honestly, what a rip-off some of them are! I just whip up my own batch now; some akadama, pumice, a bit of lava rock. Feels more like I’m actually doing something, not just opening a bag.

Getting the tree out of its old pot was the first real challenge. Sometimes they slip out easy as pie. This one? Nope. It was properly stuck. Had to run my soil knife around the inside edge a few times, give it a good, firm wiggle, and then pop, out it came. Roots were pretty much as I expected – a tight, tangled mat at the bottom. Definitely time for a trim.
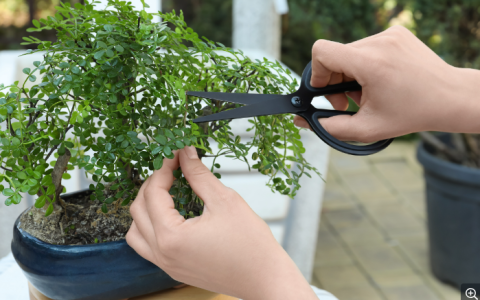
Then came the root work. This is the part that seems to scare a lot of folks, and I get it. Taking sharp tools to the roots of a tree you’ve cared for feels wrong at first. I started by gently teasing out the old soil with the root hook. You gotta be patient. Once most of the old stuff was gone, I could see what I was working with. I trimmed off about a third of the root mass, focusing on any thick, circling roots and just generally tidying things up. You need to make space for new, fine feeder roots. It’s a bit like clearing out clutter from a room so you can actually live in it.
It reminds me of when I first tried to do some serious DIY plumbing in the house. Thought I could just replace a leaky faucet, no problem. Watched a couple of videos online, how hard could it be? Ended up with water spraying everywhere, flooding the bathroom floor, and a weekend spent mopping up instead of relaxing. My wife wasn’t too thrilled, let me tell you. Had to call a professional in the end, cost me double. You learn pretty quick you can’t just go in all gung-ho without understanding the system. Same with these bonsai roots. You can’t just hack away. You need to understand how they work, what they need. These trees are living things; they don’t have a customer service line you can call when you mess up.
Settling In: The New Pad
Alright, with the root pruning done, it was time to prepare the new pot. I always put some plastic mesh over the drainage holes – stops the soil from washing out. Then I threaded a couple of pieces of wire through the smaller holes in the pot base. These are your anchor wires, super important for keeping the tree stable while the new roots establish. Don’t want it rocking about in the first gust of wind.
I put a shallow layer of my coarse drainage mix in the bottom of the new pot, then a layer of the regular soil mix on top of that, making a small mound in the middle. Carefully positioned the tree on this mound, checking the angle, the “front” – you know, all that stuff you fuss over. Then, bit by bit, I started adding more soil, working it in around the roots with a chopstick. Gotta get rid of any air pockets. That’s crucial. Gentle tapping on the side of the pot helps settle everything.
Once the soil level was right, just below the rim of the pot, I used those anchor wires I’d put in earlier. Crossed them over the root ball and tightened them gently but firmly from underneath. The tree needs to be secure, not strangled. Then came the best part: the first watering. I watered it really well, using a watering can with a fine rose, until water was pouring out of the drainage holes. This washes out any fine dust and helps settle the soil particles around the roots.
The Waiting Game and Fingers Crossed
And now? Well, now it’s sitting pretty in a sheltered spot in the garden, out of direct sun and strong winds for a few weeks. It’s had a bit of a shock, so it needs some time to recover. No fertilizer for a while either, just gentle care. It’s always a bit of a nervous wait after repotting. You hope you’ve done everything right. But these little trees are tough. Most of the time, they pull through just fine and reward you with fresh growth. It’s satisfying, this whole process. Hard work, yeah, but good work. Now, just gotta clean up this mess I’ve made…


