
Alright, let me tell you about this whole scissor lift slope and grade business. It’s one of those things that seems straightforward until it really, really isn’t, especially when you’re out there on a job site and folks are just trying to get things done fast.
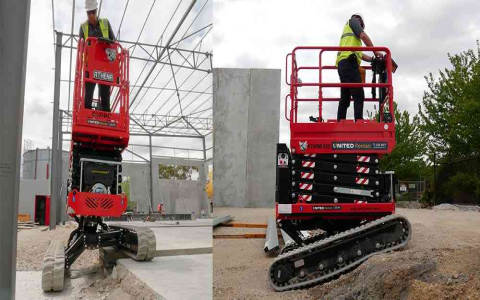
So, a while back, we were on this project, and the ground was anything but flat. We had this scissor lift, a pretty standard one, and we needed to get it into a spot that was definitely on an incline. I remember looking at it, and then looking at the slope, and thinking, “Hmm, this feels a bit sketchy.”
My first instinct, and what a lot of guys do, is just eyeball it. “Does it look too steep?” That’s a terrible way to do things, let me tell you. I’ve seen some near misses, and heard enough stories, to know that “eyeballing it” with heavy machinery is just asking for trouble.
My Process of Actually Figuring This Out
I decided I wasn’t just going to guess. So, first thing I did was try to find the damn manual for the specific lift we were using. Sometimes they’re tucked away in a site office, covered in coffee stains, or sometimes they’re just MIA. This time, luckily, I found it after a bit of digging.
Then came the “fun” part: wading through all the technical jargon to find the actual specs for operating on a slope. This is super important. Every lift is different. You can’t just assume what one lift can do, another can too.
I was looking for a couple of key things:
- Maximum slope for driving: This is usually given in degrees or a percentage grade. It tells you how steep a hill you can safely drive the lift up or down, usually when it’s stowed.
- Maximum slope for operation: This is often much, much stricter. It’s the maximum side slope or front/back slope the machine can be on while the platform is elevated. This is critical because the center of gravity shifts big time when you go up.
I found the numbers for our machine. They weren’t some vague guidelines; they were hard limits. For example, it might say something like “2 degrees side slope” or “5% grade for driving stowed.” These numbers seem small, and they are! That’s the point. Scissor lifts are not all-terrain vehicles, especially when you’re up in the air.
Next, I actually had to try and figure out the slope of the ground we were dealing with. You can get fancy with tools like a clinometer or a digital level, or even do some basic math with a level and a tape measure if you remember your school geometry. The point was, I wasn’t guessing anymore. I got a real measurement.
Turns out, the area we were initially looking at was way over the limit for operating the lift elevated. No way. We would have been seriously risking a tip-over. Just because the lift could drive there (maybe, if it was within the stowed driving slope limit) didn’t mean we could go up in the basket.
What I Learned and Why It Matters
So, we had to rethink our approach. We ended up spending extra time leveling an area, or finding a different access route. It was a bit of a pain, sure, but way less of a pain than an accident, an injury, or a damaged machine.
The big takeaway for me was to always check the manual for the specific machine you are using. Don’t rely on what someone else says, or what you did last time with a different lift. Those little tilt sensors and alarms are on the machine for a reason, but you don’t want to be the guy who finds out they work by almost tipping over.
And this whole “grade” versus “degrees” thing? It’s just two ways of saying the same thing. Grade is usually a percentage (like rise over run, times 100), and degrees are, well, degrees of an angle. The manual will specify. Just make sure you understand what it’s telling you.
Honestly, this experience just reinforced my belief that taking a few extra minutes to check the specs and assess the situation properly is always worth it. It’s not about being slow; it’s about being safe and professional. Some folks might rush, but I’d rather be the one who makes sure everyone goes home in one piece.


