

Okay, here’s my blog post about building a tall modern plant stand, written in a casual, first-person style:
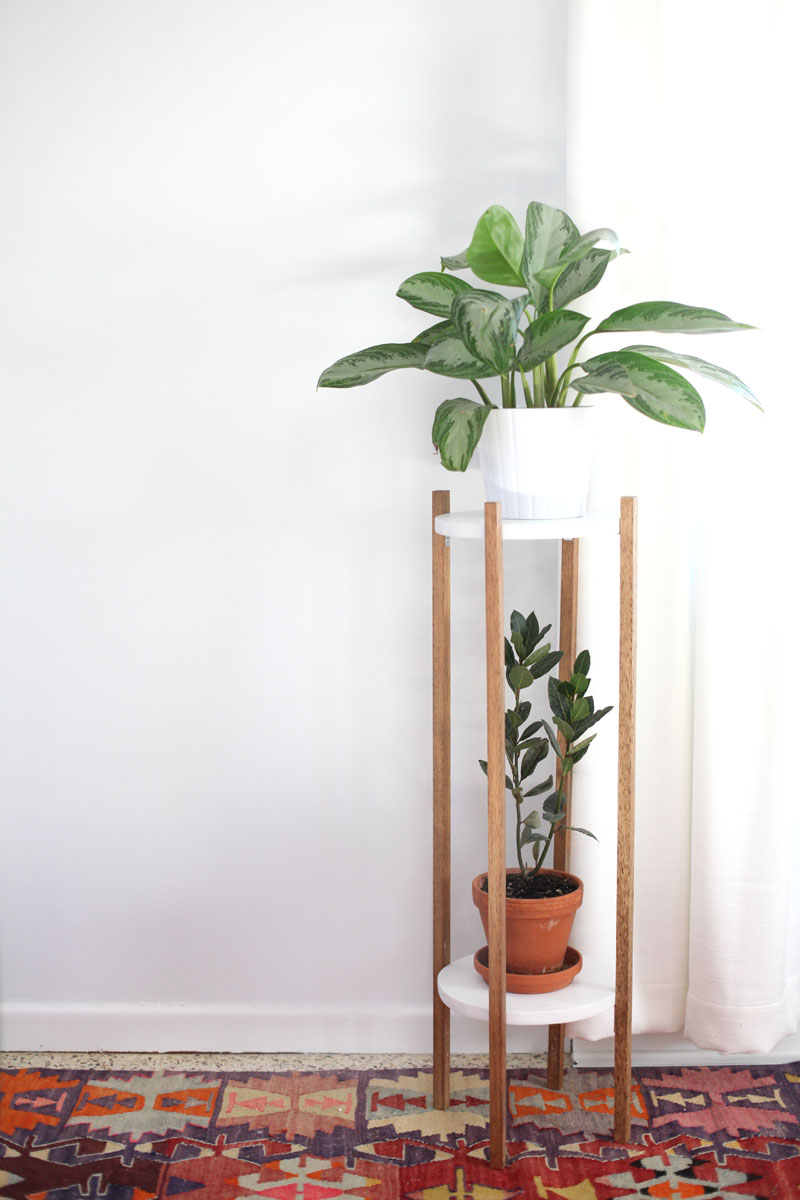
So, I’ve been wanting to add some greenery to my living room, and I had this specific vision of a tall, slender plant stand to elevate a leafy friend. I looked around online, but everything was either way too expensive or just not quite right. So, naturally, I decided to make one myself!
First, I gathered my materials. I’m no woodworking expert, so I went with simple stuff I could find at the local hardware store:
- Some square wooden dowels – I think they were about 1 inch thick.
- A square piece of wood for the base (a bit wider than the dowels).
- Wood glue – the strong kind!
- Wood screws (just in case the glue wasn’t enough).
- Sandpaper (various grits, from coarse to fine).
- Wood stain (I chose a dark walnut color).
- A sealant, for protecting my stand.
Cutting time
I started by cutting the dowels to the height I wanted the stand to be. I think I went for about 3 feet tall. Make sure to cut them as straight as you can!. Then, I cut four shorter pieces of dowel to form the supports for the pot platform.
Next, I assembled the legs. I used wood glue to attach the shorter dowel pieces to the taller ones, creating four “L” shaped legs. I clamped them together and let them dry overnight. Just to be extra safe, I also added a wood screw to each joint, countersinking them so they wouldn’t stick out.
While the legs were drying, I worked on the base. I sanded down the edges of the square piece of wood so they were nice and smooth. Nothing fancy, just making sure there were no splinters.
Glue and screw
Once the legs were dry, I attached them to the base. I used a generous amount of wood glue and positioned the legs in the corners of the base. Again, I clamped everything down and let it dry completely. And again, I added some screws for extra stability.
For the platform, I cut another square base, but this time I used a wood that was a bit thinner. Once it dried, I glued it to the top of the legs, and clamped it until fully dry.
After the main structure was assembled, it was time for sanding. I started with coarse-grit sandpaper to smooth out any rough edges or uneven joints, then gradually moved to finer grits to get a really smooth finish. This part took a while, but it’s worth it for a professional-looking result.

Finally, the fun part: staining! I applied a coat of the dark walnut stain, following the directions on the can. I let it dry, then applied a second coat for a richer color. Once the stain was completely dry, I applied a sealant to protect the wood and give it a nice, finished look.
And that’s it! My very own, custom-made, tall modern plant stand. It wasn’t super complicated, and it definitely saved me some money compared to buying one. Plus, there’s something really satisfying about making something with your own hands. Now I just need to pick out the perfect plant to put on it!


