
Okay, here’s my blog post about repotting my ponytail palm, written in a casual, personal style:
So, my ponytail palm was looking a little… cramped. You know, like it was bursting out of its pot. It was definitely time for an upgrade! I’d been putting it off, but today was the day. I finally got around to repotting it, and it wasn’t as bad as I thought it would be.

Getting Started
First, I gathered all my stuff. I needed:
- A new pot (obviously!), just a bit bigger than the old one.
- Some fresh potting mix – I went with something well-draining, because these guys don’t like wet feet.
- My trusty gardening gloves.
- A trowel.
- Some water.
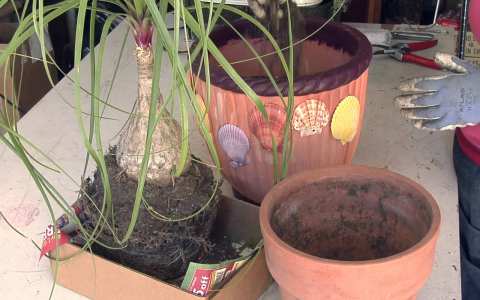
The Dirty Work
I put on my gloves – gotta protect those hands! Then, I gently tipped the old pot on its side and wiggled the ponytail palm out. It took a little bit of coaxing, but it finally came loose. The roots were definitely packed in there, so I knew I’d made the right call on repotting.
I loosened up the roots a bit with my fingers, just to encourage them to spread out in the new * i removed the old soil that was easy to get to.
New Home, Sweet Home
Next, I put a layer of the new potting mix in the bottom of the new pot. Then, I placed the ponytail palm in the center and started filling in around the roots with more potting mix. I made sure to pack it down gently, but not too tight – you want the roots to be able to breathe!
I kept filling until the soil was about an inch below the rim of the pot. Then, I gave it a good watering, letting the water drain out the bottom. Make sure that excess water can get out!
All Done!
And that’s it! My ponytail palm is now happily settled in its new, bigger home. I placed it back in its usual spot, where it gets plenty of bright, indirect light. Hopefully, it’ll be much happier now, and, I can wait to see it grow even bigger!


