
Okay, let’s talk about what I did today – repotting my bromeliad. It was kinda overdue, and honestly, I was a bit nervous ’cause I didn’t want to mess it up. First off, I gathered all the stuff I needed. I put on my protective gloves ’cause, you know, safety first. Then I got some fresh potting soil and a new pot that’s a bit bigger than the old one. I also grabbed a couple of wooden stakes, just in case my plant needed some extra support after the move.
Getting Started
I started by gently removing the bromeliad from its old pot. I was careful not to pull too hard, just kinda wiggled it out. The roots looked okay, but it was definitely time for a change. I shook off the old soil – it was all dry and crumbly.

The Repotting Process
Next, I filled the new pot with some of that fresh soil. I made a little hole in the middle and carefully placed my bromeliad in there. I added more soil around the base, making sure it was snug but not too tight. Then, I used those wooden stakes to help it stand up straight. It looked a bit wobbly at first, but the stakes did the trick.
Taking Care of the Pups
Now, my bromeliad had a couple of pups – those little baby plants growing off the main one. I decided to leave them attached for now. I read somewhere that if you leave them on the mother plant until she completely dries up, the pups will be stronger and more likely to survive. If I were to cut them off now, the plant might keep making more pups, but they’d be weaker. So, I figured I’d let nature take its course.
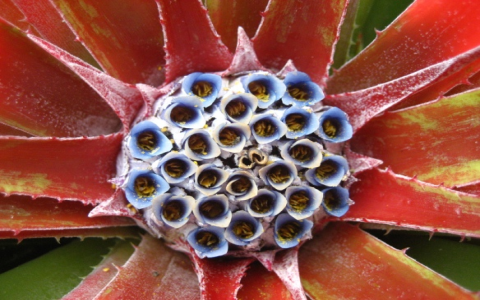
Watering and Care
I watered it using the central ‘vase’ part, which is apparently where these plants like to get their drink. I filled it up, making sure not to overdo it. Apparently, they don’t like tap water much because of the chemicals, but I didn’t have any other water on hand, so I just used what I had. I’ll have to remember that for next time. I also placed it in a spot with plenty of bright light but not directly under the sun.
Final Thoughts
All in all, it wasn’t as hard as I thought it would be. My bromeliad looks happy in its new home, and hopefully, it’ll keep growing and thriving. I’ll keep an eye on those pups and see how they do. Maybe one day, I’ll have a whole family of bromeliads!
- Remember to use gloves.
- Choose a slightly larger pot with fresh soil.
- Be gentle when removing the plant from its old pot.
- Support the plant with stakes if needed.
- Water through the central ‘vase’.
- Keep the plant in bright, indirect light.
Repotting can be a bit messy, but it’s worth it to see your plants happy and healthy. If you’ve got a bromeliad that needs a new pot, don’t be scared to give it a go. Just follow these simple steps, and you’ll do great!


