
Okay, so, I got this idea to make a watering can, but not just any watering can, a pottery one. I’ve always liked getting my hands dirty and trying new things, so I thought, why not? Plus, I needed a new watering can, and the ones in the store are just so boring. So I start to think, how hard can it be to make my own pottery watering can?
First, I went to this local pottery studio. Never been to one before, but it looked like fun in the movies. They had all this clay and these spinning wheel things. I signed up for a class – figured I should probably learn the basics before I make a mess.

The class was cool. The instructor, this old lady named Betty, she was a real pro. She showed us how to center the clay, which is way harder than it looks. You gotta push and pull the clay on the wheel to get it all smooth and even. My first few tries? Let’s just say they were… abstract.
But after a few classes, I started to get the hang of it. I made a couple of bowls, a wonky vase, you know, the usual beginner stuff. But I really want to make this watering can. So, I talked to Betty, and she gave me some tips. She said the trick is to make the body and the spout separately and then attach them. Sounded simple enough.
Start Working
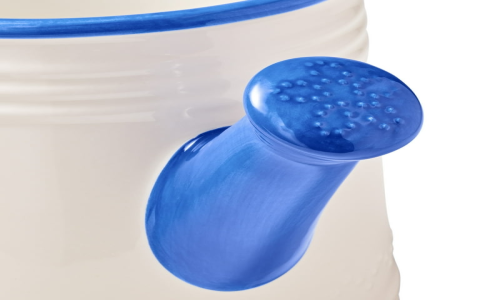
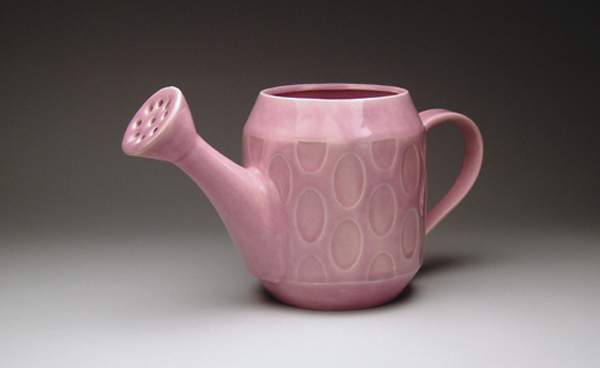
I spent the next few classes working on the watering can. First, I made the body. It’s basically a big, round cylinder with a flat bottom. I had to make sure the walls were thick enough to hold water but not too thick that it would be super heavy. Then came the spout. That was tricky. I had to shape it so the water would flow out nicely. It took a few tries, but I finally got one that looked right. Then we need to attach them together.
Attaching the spout to the body was a whole other challenge. You gotta score the clay, which means making little scratches on the parts you want to join. Then you use slip, which is basically liquid clay, as glue. I carefully attached the spout, smoothed out the edges, and hoped for the best.
After that, it was time to let it dry. Pottery takes forever to dry, I learned. You gotta let it sit for like a week, maybe more. Then comes the fun part – the firing. That’s when you put the pottery in a kiln, which is like a super-hot oven. It gets up to like 2000 degrees, can you believe it? The heat makes the clay hard and strong.
Final Step
When my watering can came out of the kiln, I was so excited. It looked awesome! A little lopsided, sure, but that just gave it character. I took it home, filled it with water, and tried it out on my plants. And you know what? It worked! Water came pouring out of the spout, just like it was supposed to. I was so proud of myself. I made a working watering can out of clay! It was pretty heavy to use, but I did not care.
So, that’s my pottery watering can story. It was a lot of work, but totally worth it. Now I have a one-of-a-kind watering can, and I learned a new skill. Plus, it’s a great conversation starter. I will try to make more pottery in the future! Everyone’s always asking me where I got it. I just smile and say, “Oh, I made it myself.”


