Enchanting Floral Gardening: Nature's Palette
  • Flowers & Plants
  • Gardening Knowledge
    • Light
    • Watering
    • Fertilizing
    • Pruning
    • Soil
    • Repotting
    • Temperature
  • Pests & Diseases
  • Flower Fertilizers & Pesticides
  • Gardening Tools
    • Flowerpot
    • Gardening Scissors
    • Gardening Gloves
    • Shovel
    • Watering Can
    • Gardening Stand
No Result
View All Result
Enchanting Floral Gardening: Nature's Palette
No Result
View All Result
Home Soil

Learning how to install artificial grass on soil? Avoid common mistakes with our expert tips.

bloommelody by bloommelody
2025-03-30
in Soil
0
Learning how to install artificial grass on soil? Avoid common mistakes with our expert tips.
Share on FacebookShare on Twitter

Right, so I finally got around to sorting out that patch of mud that used to be my lawn. Decided artificial grass was the way to go. Tired of mowing, tired of the muck. Let me tell you how I tackled putting artificial grass down directly onto the soil area I had.

Getting the Ground Ready

First things first, I had to clear out the old mess. That meant digging up the existing patchy grass and all the weeds. This was sweaty work, not gonna lie. Used a spade and just got stuck in. You need to go down a fair bit, maybe 3 to 4 inches, to get rid of the roots and make space for the new base.

Related articles

Toilet Soil Removal Best Methods Easy Step by Step Guide

Where to Find Black Gold Soil Near Me Local Places Today

Learning how to install artificial grass on soil? Avoid common mistakes with our expert tips.

Once the area was cleared, it looked like a proper mess, just bare soil. I made sure the ground underneath was reasonably level, broke up any big clumps of dirt. Then, the important bit: getting a solid base down.

  • I got a load of crushed rock, I think they call it MOT Type 1 or something similar? Spread that out evenly over the soil.
  • Then I rented a vibrating plate compactor – one of those ‘wacker plate’ things. Went over the crushed rock again and again until it was packed down hard and flat. This bit’s crucial, don’t skip it or skimp on it, otherwise you’ll get dips later.
  • On top of the compacted rock, I added a layer of sharp sand. Spread it out, maybe an inch or two deep.
  • Used a long piece of timber to screed the sand level. Took a while to get it nice and smooth. Checked it with a spirit level too.

Compacting is key, seriously. You want a base that won’t sink.

Stopping the Weeds and Rolling Out the Green

Didn’t want weeds trying to push through my nice new grass. So, before the grass went down, I laid out a weed barrier membrane over the sand. Just unrolled it, overlapped the edges by a few inches, and cut it roughly to shape. Some folks tack it down, I just let the grass hold it mostly.

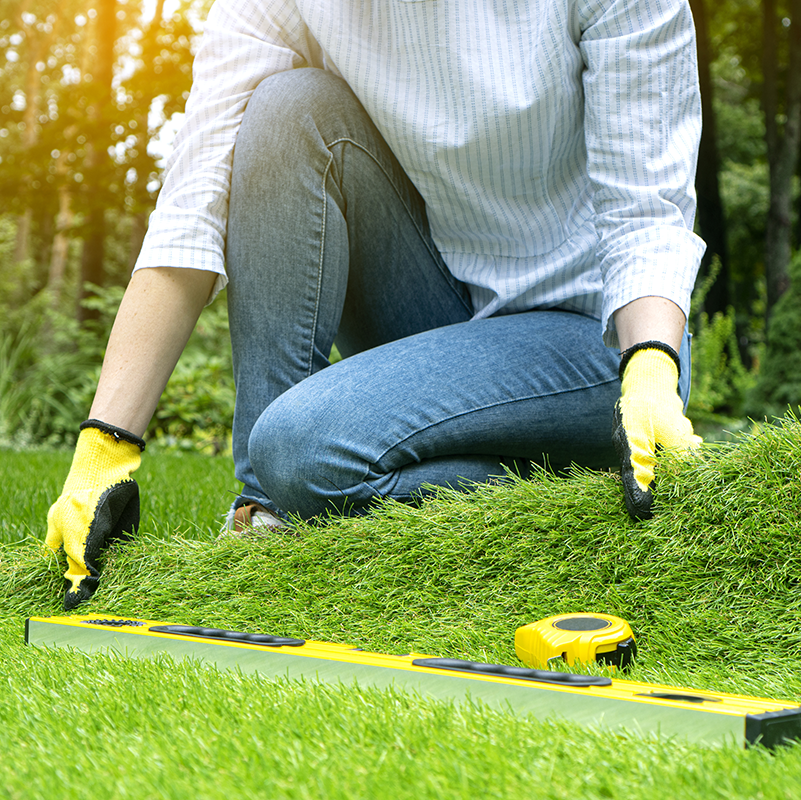
Then came the main event – the artificial grass itself. Those rolls are heavy! Definitely helps to have an extra pair of hands. We carefully unrolled it over the prepared area. Leave it to settle for an hour or two, especially if it’s sunny. Helps get the creases out from being rolled up.

Once it had relaxed a bit, I started trimming it to fit the shape of my lawn area. Used a really sharp utility knife for this. Changed the blade often to keep the cuts clean. Take your time with the cutting, measure twice, cut once, you know the drill. Especially around curves or corners, go slow.

Finishing Touches

My area was small enough I didn’t need to join pieces, but if you do, you’ll need special tape and adhesive for the seams. Make sure the grain of the grass runs the same way on both pieces if joining.

To stop the edges lifting, I hammered in galvanized nails, about 6 inches long, all around the perimeter. Spaced them maybe every foot or so, just inside the edge so they don’t show too much. Really banged them down well into the base layer.

Learning how to install artificial grass on soil? Avoid common mistakes with our expert tips.

Some people skip this, but I decided to add infill sand. Just sprinkled kiln-dried sand evenly over the top. Then I used a stiff garden broom to brush it deep into the fibres. This helps weigh the grass down, protects the backing, and makes the blades stand up nicely.

And that was pretty much it. Gave it a final brush up, stood back, and yeah, massive improvement. No more mud, just green. Was a weekend’s hard graft, but worth it seeing the result.

bloommelody

bloommelody

Related Posts

Toilet Soil Removal Best Methods Easy Step by Step Guide

Toilet Soil Removal Best Methods Easy Step by Step Guide

by jim
2025-08-06
0

Alright so today I tackled the nasty toilet stains that’ve been building up for weeks. Seriously that brown ring just wouldn’t budge no matter how much...

Where to Find Black Gold Soil Near Me Local Places Today

Where to Find Black Gold Soil Near Me Local Places Today

by jim
2025-08-01
0

Alright, so I’ve been trying to grow these heirloom tomatoes on my balcony for months, right? But they kept looking sad and yellowish no matter what...

Top Soil for Reptiles Why It Matters and How to Choose for Your Tank

Top Soil for Reptiles Why It Matters and How to Choose for Your Tank

by jim
2025-07-27
0

Man, this reptile topsoil thing gave me more headaches than I expected at first. Just slapped some random “natural” dirt in my bearded dragon’s tank cause...

Why choose soil moisture sensor raspberry pi key benefits revealed.

Why choose soil moisture sensor raspberry pi key benefits revealed.

by jim
2025-07-26
0

Okay so listen, last Tuesday my basil plants looked seriously sad. Like, proper dead. I watered them tons but didn’t help. Felt bad, man. That’s when...

Why soil separator fabric matters? Learn its key uses and benefits explained!

Why soil separator fabric matters? Learn its key uses and benefits explained!

by jim
2025-07-03
0

Alright, let’s dig into this soil separator fabric thing – literally. Folks asked why I bothered with it in my backyard project, so here’s the whole...

Next Post
Need unique painted watering can ideas? Check out these cool designs you can make yourself today.

Need unique painted watering can ideas? Check out these cool designs you can make yourself today.

Best Time to Fertilize St Augustine in Texas? Find Out!

Best Time to Fertilize St Augustine in Texas? Find Out!

Clearwaters Top Choice: Florida Fertility Institute Explained

Clearwaters Top Choice: Florida Fertility Institute Explained

CATEGORIES

  • Fertilizing
  • Flower Fertilizers & Pesticides
  • Flowerpot
  • Flowers & Plants
  • Gardening Gloves
  • Gardening Knowledge
  • Gardening Scissors
  • Gardening Stand
  • Gardening Tools
  • Light
  • Pests & Diseases
  • Pruning
  • Repotting
  • Shovel
  • Soil
  • Temperature
  • Watering
  • Watering Can

RECOMMENDED

Outdoor Metal Watering Can: How to Choose the Perfect One?
Watering Can

Outdoor Metal Watering Can: How to Choose the Perfect One?

2024-12-14
Need to Prune Your Aglaonema? (Heres When and How to Do It!)
Pruning

Need to Prune Your Aglaonema? (Heres When and How to Do It!)

2025-03-04
Enchanting Floral Gardening: Nature's Palette

Gardening is actually easy

pexels-photo-298246
roses-bouquet-congratulations-arrangement-68570
pexels-david-bartus-43782-714918
1704070288593363160_7_ainote_new
pexels-photo-85773
17071874890767616772_3_ainote_new
u=1477108710,1302668665&fm=253&fmt=auto&app=138&f=JPEG
pexels-photo-931179
94339887ba0b48118d17e18d1112938b
Elevating Your Gardening Stand: Cultivating a Sanctuary of Wellness and Harmony
  • About
  • Advertise
  • Privacy & Policy

© 2025 Bloom Melody - https://www.bloommelody.com

No Result
View All Result
  • Flowers & Plants
  • Gardening Knowledge
    • Light
    • Watering
    • Fertilizing
    • Pruning
    • Soil
    • Repotting
    • Temperature
  • Pests & Diseases
  • Flower Fertilizers & Pesticides
  • Gardening Tools
    • Flowerpot
    • Gardening Scissors
    • Gardening Gloves
    • Shovel
    • Watering Can
    • Gardening Stand

© 2025 Bloom Melody - https://www.bloommelody.com