
Alright, so dealing with my bank of Trojan batteries, especially keeping the water levels topped up, used to be a real chore. I mean, who actually enjoys unscrewing all those caps, peering into each cell with a flashlight, trying not to splash acid everywhere? I was always putting it off, which I know isn’t good for the batteries. My back would ache from leaning over, and I’d always end up with grime on my hands.
I’d heard folks talking about these single-point watering systems, and the Trojan one, often called the “HydroLink Watering System” or something similar if you get their official kit, kept popping up in discussions. Sounded like a good idea – fill all your batteries from one spot. Less mess, less hassle. So, I decided to bite the bullet and get one for my setup. It was either that or eventually ruin another set of expensive batteries from neglect.
Getting Started with the Kit
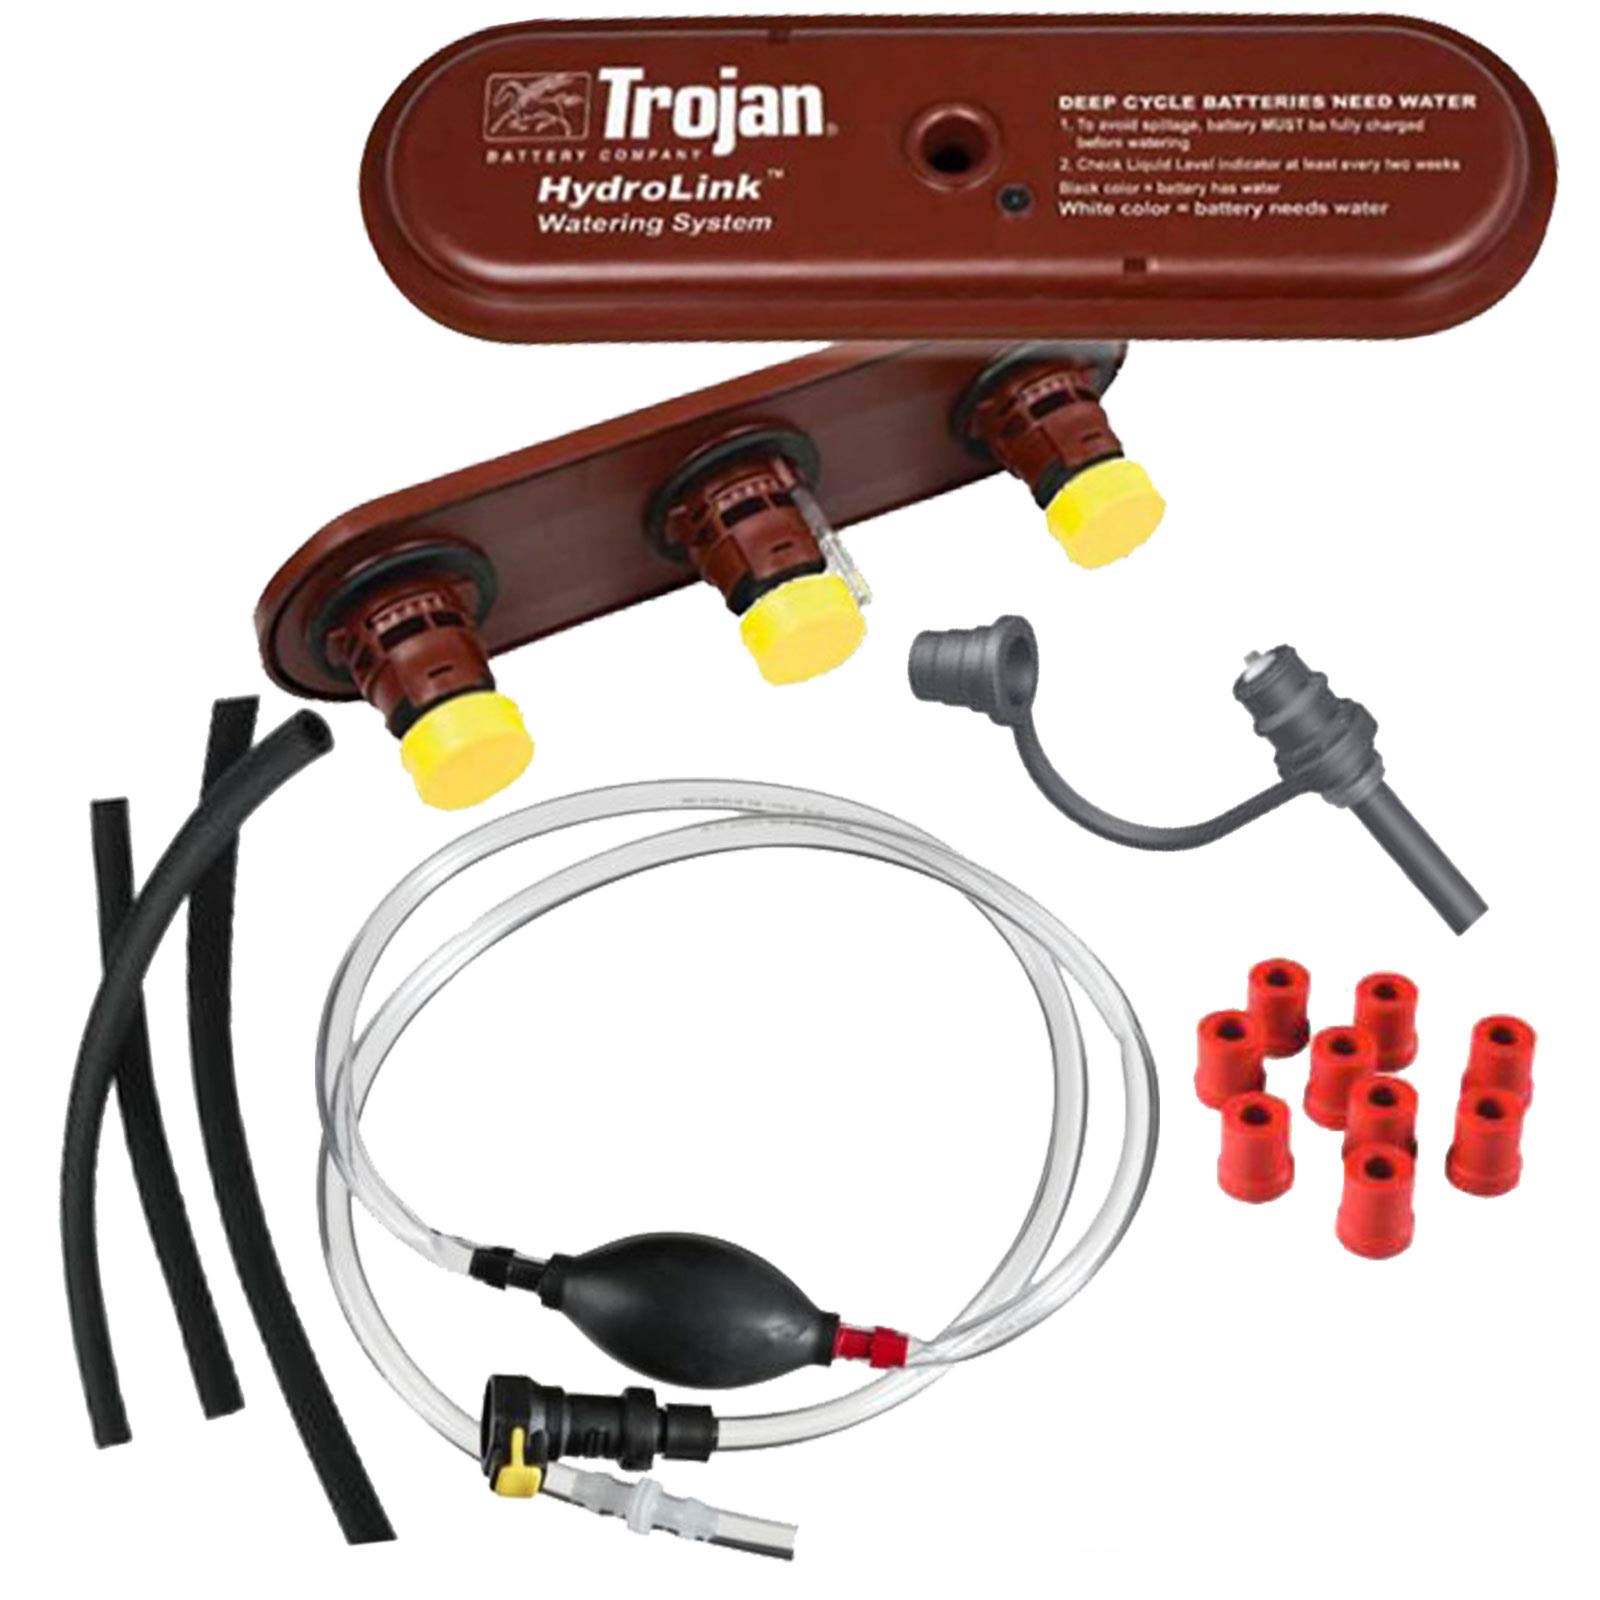
When the kit arrived, I laid all the pieces out. Looked a bit like a plumbing project for a dollhouse – lots of little tubes, special valve caps, and a hand pump. The first step was actually the most straightforward: I had to take off all the old battery vent caps. Some were a bit stiff, but they all came off okay. I made sure the tops of the batteries were reasonably clean first, didn’t want any dirt falling in.
Then, I started installing the new valve assemblies. Each one replaces a standard vent cap. They just push in and then you give them a quarter turn to lock them in place, or at least that’s how mine worked. You gotta make sure they’re seated properly. Each valve has this little white indicator, a small “eye,” that tells you when the cell is full. That’s the clever bit, I reckon.
Connecting the tubing was next. This part required a bit of patience. I had to cut sections of the clear tubing to link each valve to the next one in the series, going from battery to battery. The instructions showed a specific order, usually connecting all the positives then all the negatives, or just daisy-chaining them. I tried to keep the tubes neat, without too much slack but also without any kinks. You push the tubing onto the barbed fittings on each valve. Getting a snug fit here is super important to avoid any leaks later.
Once all the batteries were linked up with the tubing, the final step was to connect the main fill tube that has a quick-connector on one end and goes to the hand pump on the other. The hand pump itself is pretty basic, you just stick its intake hose into your jug of distilled water.
The First Fill-Up
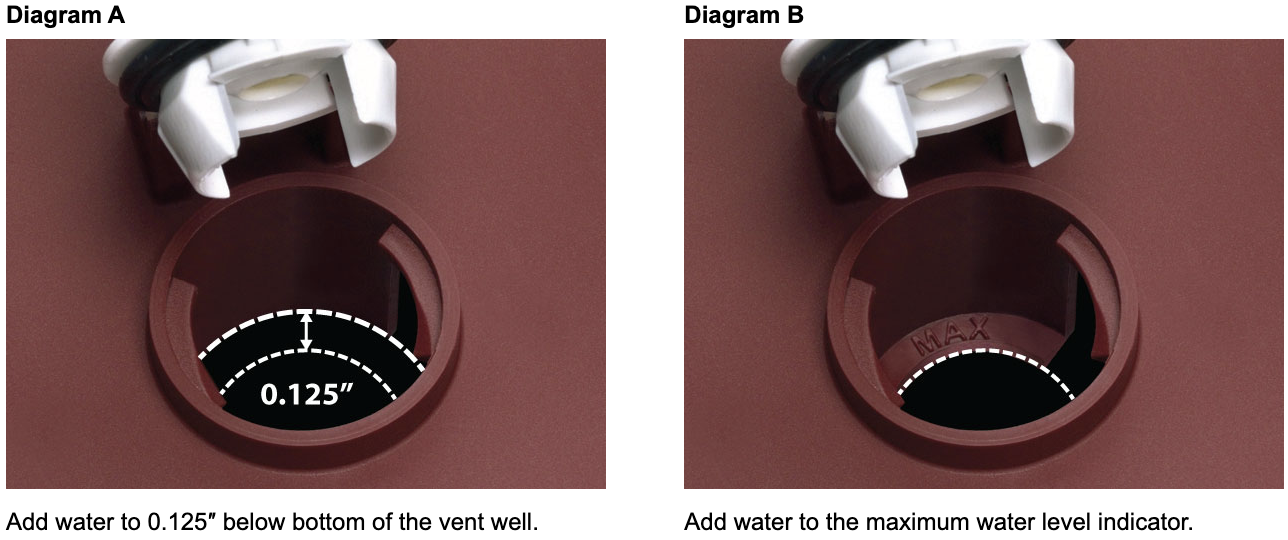
I was a bit nervous the first time I used it. Double-checked all my connections. Then, I put the intake hose of the pump into my distilled water jug and connected the pump’s output hose to the quick-connector on the battery system. I started squeezing the hand pump. It took a few pumps to get the water flowing through all the tubes. Then, one by one, I watched those little white indicators on the valve caps pop up. It was pretty satisfying, actually. As each cell reaches the correct electrolyte level, its valve automatically shuts off flow to that cell and the indicator becomes visible. You just keep pumping until all the indicators are up.
No spills, no overfilling (as far as I could tell), and it was way faster than doing each cell individually. I probably filled all my batteries in under five minutes, whereas before it could take me a good 20-30 minutes of fiddly work.
Now, maintaining the water levels is so much simpler. Every month or so, I just connect the pump, give it a few squeezes until all the indicators show full, and that’s it. It’s taken one of the most annoying parts of battery maintenance and made it almost foolproof. I do still keep an eye on things, make sure no tubes are leaking or anything, but overall, it’s been a great addition. Definitely worth the effort of setting it up for the time and hassle it saves in the long run.


