
Okay, so today I wanna talk about sharpening my gardening tools. You know, it’s that time of year when we’re all out in the yard, getting our hands dirty. And let me tell you, there’s nothing worse than trying to prune a rose bush with dull clippers. It’s like trying to cut your steak with a butter knife – just ain’t gonna happen efficiently, and you’ll probably end up hurting the plant, or yourself!
So, I finally decided to do something about my sorry excuse for a gardening tool collection. Most of them were pretty blunt, and some even had a bit of rust. I mean, I’m no expert, but I know that’s not good.
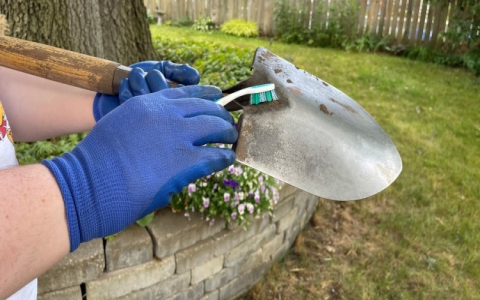
First things first, I gathered all my tools that needed some TLC. We’re talking pruning shears, loppers, a hand trowel, and even my trusty hoe. I laid them all out on my workbench in the garage. It was quite a sight – a testament to my, uh, “relaxed” approach to tool maintenance.
Next, I grabbed my sharpening stone. It’s this rectangular block thingy that feels kinda rough. You can get these at pretty much any hardware store, from what I know. I also filled up a small bucket with water, ’cause you need to keep the stone wet while you’re using it.
Sharpening Process
- I started with my pruning shears. I opened them up and looked at the blade. You could see where it was all nicked and dull.
- Then, I dipped my sharpening stone in the water and started rubbing it against the beveled edge of the blade. I made sure to follow the original angle of the blade – that’s pretty important, I think.
- I kept doing this, back and forth, back and forth, until I could see a shiny new edge forming. It took a little while, but it was kinda satisfying, like watching a magic trick or something.
- Every now and then, I would wipe the blade with an old rag to see my progress. It’s cool to see the difference, the metal goes from all dull to actually shining again.
- Once I was happy with one side, I flipped the shears over and did the same thing to the other blade. Teamwork and all that.
I basically repeated this process for all my other tools. The loppers were a bit more challenging because they’re bigger, but the principle is the same. The trowel and hoe were easier, since they just have one edge to worry about. They do need to be sharp as well, though, otherwise you’re just mashing up your soil.
After I was done with the sharpening stone, I grabbed some steel wool and rubbed down all the metal parts to get rid of any rust. That makes them look a whole lot nicer and probably will make them last longer. Finally, I wiped everything down with an oily rag to protect the metal and keep it from rusting again.
Let me tell you, the difference is night and day. My tools are like brand new now! I tested them out on a few branches, and they cut through like butter. I’m actually looking forward to getting back out in the garden now. It’s amazing what a little bit of maintenance can do. I’m not going to lie, it felt pretty good to get that done and out of the way, and my plants will surely thank me. It is one of those things that you should do, but never get around to.
So, if your gardening tools are looking a little worse for wear, I highly recommend giving them a good sharpening. It’s not that hard, and it makes a world of difference. And believe me, the first time you make a nice, clean cut on a thick branch, you’ll see it was worth the small effort. Plus, it’s kinda fun, in a weird, nerdy way. Now, if you’ll excuse me, I’ve got some bushes to prune!


