Okay, so I’ve been getting into gardening lately, and I decided to tackle pruning my ginkgo tree. I gotta say, it was a bit more involved than I initially thought, but it was a good learning experience. I started this whole thing in late winter, right before the spring growth kicked in. They say that’s the best time to do it, and honestly, it made sense to me.
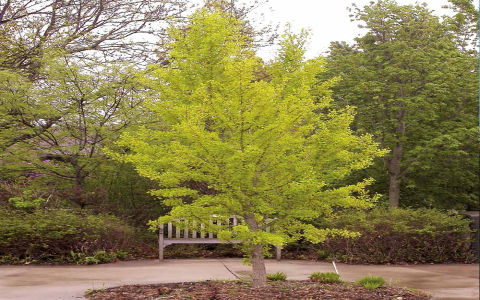
First off, I took a good look at my tree. It’s been growing well, but I noticed some branches were getting a bit too cozy with each other. There was a bunch of dead wood, too, which, you know, just wasn’t doing the tree any favors. I figured it was time to step in and give it some shape.

I started by grabbing my pruning tools. Got myself a pair of sharp shears and a small saw, you know, nothing too fancy. Safety first, though, so I also put on some gloves and eye protection. I read somewhere that you should clean your tools before and after pruning to prevent spreading any diseases, so I did that, too. Better safe than sorry, right?
- Gathering Tools: I made sure I had everything I needed – sharp shears, a small saw, gloves, and eye protection.
- Cleaning Up: I cleaned my tools with some disinfectant.
- Assessing the Tree: I took a long, hard look at my ginkgo to identify overcrowded and dead branches.
I began with the small, dead branches. Snipped them off close to the main branch. Then, I moved on to the branches that were crossing or rubbing against each other. It felt a bit like untangling a messy necklace. The goal was to give each branch enough space to grow without bumping into its neighbors. I also trimmed some of the lower branches to raise the canopy a bit. Made the tree look a little tidier, in my opinion.
For the thicker branches, I used my saw. I made sure to cut just outside the branch collar. I definitely didn’t want to damage the main trunk. It was a bit of work, but seeing the tree take shape was pretty satisfying. I stepped back a few times to check my progress and make sure I wasn’t going overboard.
Key Steps I Followed
- Removing Dead Wood: I started by cutting off all the dead and obviously lifeless branches.
- Thinning Out: I carefully removed branches that were too close to each other, ensuring each one had enough space.
- Raising the Canopy: I trimmed some lower branches to give the tree a neater look.
- Using the Right Tools: I switched to a saw for thicker branches, always cutting outside the branch collar.
After I was done, I collected all the branches and leaves I had pruned. I didn’t want to leave a mess in my garden. I’m thinking of starting a compost pile, so maybe these cuttings will come in handy for that. We’ll see.
All in all, pruning my ginkgo tree was a pretty cool experience. It’s amazing how a little bit of work can make such a big difference in the tree’s appearance and health. I’m no expert, but I feel like I did a decent job. I’m already looking forward to seeing how it grows this spring. Gardening is definitely something I want to keep doing. It’s relaxing, and there’s something really rewarding about nurturing a living thing and watching it thrive.


