
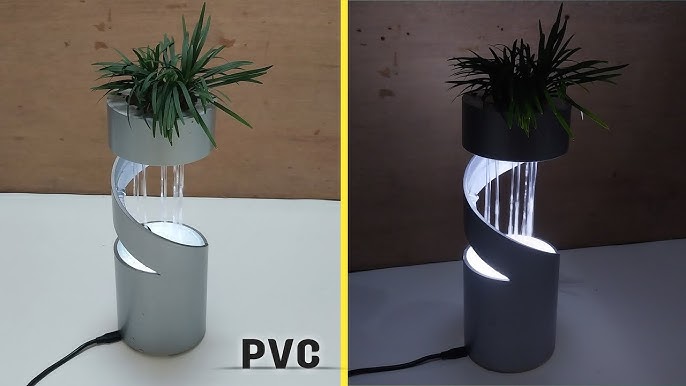
Alright folks, today’s project was honestly a bit of a sparky adventure – I wanted my indoor plants to glow a little after dark. My plain terracotta pots were just feeling kinda boring, y’know? So I jumped online and dug up those DIY light-up planter ideas. Seemed doable enough! Grabbed my keys and hit the craft store first thing.
Here’s the junk I ended up buying:
- Terracotta pots in small, medium, and that one big fella I love
- Copper wire fairy lights with a battery pack thing
- Pourable craft resin – gotta get the clear kind
- Quick-dry epoxy glue
- Painter’s tape
- Sandpaper
- Cheap plastic measuring cups for mixing
- Disposable gloves
Got home with dirt stains on my jeans already. First step was prepping the pots. I gave them a good clean – dust, little bits of old soil – just wiped ’em down with a damp cloth. Let ’em dry completely near the window.
Phase One: Hiding the Lights
Started with the smallest pot, kinda like practice. I grabbed those copper wire lights and just started loosely wrapping them around the outside. Wanted it kinda messy, organic-like. Taped the wire ends down with that painter’s tape to hold everything snug against the pot. Took forever to get it looking natural and not bunched up weirdly. Battery pack just hung at the bottom.
Phase Two: Gloop and Glitter
Put on the gloves – resin is sticky business! Mixed up a small batch of the resin stuff. Pour equal parts resin and hardener into the plastic cup? Stirred slowly for like 5 minutes trying not to make too many bubbles. Felt like forever. Once it looked like slightly thick honey, I started pouring it over the wires wrapped on the pot. Tilted the pot slowly so the resin flowed and covered all the lights nicely. Few drips on the table. Oops. Used a toothpick to pop the bigger bubbles as I went. Propped the pot level and left it alone for a full day. Touched it once, left a fingerprint. Great.
Phase Three: Juice ‘Em Up
Bigger pots needed a clean look. Sanded the outsides lightly so the resin would stick better. This time, I glued the lights directly onto the pot with the epoxy glue, making neat little patterns, kinda like geometric doodles. Let that glue dry rock solid overnight. Then mixed resin again and poured over my glued light patterns. Covered the battery pack too on the big one, made a little resin casing. Turned the lights on while the resin was wet? Yeah, saw the glow underneath. So cool.

Phase Four: Bring in the Green
Day later, resin was hard as plastic. Peeled off the painter’s tape. The cured resin felt so smooth! Added fresh potting soil to each pot. Carefully transplanted a little succulent into the small glowing pot, a spider plant in the medium one, and that big one got my favorite fiddle leaf fig. Didn’t wanna whack the root ball too hard.
Plugged in the battery packs – pushed that little button… Boom! Soft, warm glow all over the pots! Checked every strand lit up. Pushed the battery packs discreetly under the rim or buried slightly under some decorative moss. Put ’em back on their stands and turned off the room lights.
Quick Notes On Not Burning the Place Down (Probably):
- LED lights only! Nothing that gets hot.
- Make sure battery packs are easy to reach, can’t bury ’em deep.
- Water carefully? Don’t flood that resin-covered battery case.
Looked amazing in the dim corner of my living room. The plants kinda float in their own little light. Messy process, few hiccups, but totally worth it! Time to chill with some tea and admire my glowy jungle.


