Enchanting Floral Gardening: Nature's Palette
  • Flowers & Plants
  • Gardening Knowledge
    • Light
    • Watering
    • Fertilizing
    • Pruning
    • Soil
    • Repotting
    • Temperature
  • Pests & Diseases
  • Flower Fertilizers & Pesticides
  • Gardening Tools
    • Flowerpot
    • Gardening Scissors
    • Gardening Gloves
    • Shovel
    • Watering Can
    • Gardening Stand
No Result
View All Result
Enchanting Floral Gardening: Nature's Palette
No Result
View All Result
Home Flowerpot

Cute Ceramic Flowerpot: Best Picks for Your Indoor Plants!

bloommelody by bloommelody
2025-02-23
in Flowerpot
0
Cute Ceramic Flowerpot: Best Picks for Your Indoor Plants!
Share on FacebookShare on Twitter

Okay, here’s my blog post about making a ceramic flowerpot, written in a casual, personal style:

So, I’ve been wanting to get into pottery for a while, you know, get my hands dirty and make something cool. I finally took the plunge and signed up for a beginner’s ceramics class. Our first project? A simple flowerpot. Sounds easy enough, right? Well, let me tell you, it was a journey!

Related articles

How to use flowerpot b2: Top 5 tips for great plant care.

Flowerpot vp9 pink care tips make your plants thrive better

Cute Ceramic Flowerpot: Best Picks for Your Indoor Plants!

Getting Started

First, we learned about the clay. We used earthenware clay because that what the studio had. It’s pretty forgiving, which is good for newbies like me. The instructor showed us how to wedge the clay, which is basically like kneading dough. You gotta get all the air bubbles out, or your pot might explode in the kiln! I spent a good while just smushing the clay around, trying to get the hang of it. It’s harder than it looks to get it all smooth and consistent.

Building the Pot

We used the coil method to build our pots. This means rolling out long, snake-like coils of clay and then stacking them on top of each other to form the walls of the pot.

  • Roll the coils: I tried to make my coils nice and even, but they definitely weren’t perfect. Some were thicker, some were thinner, it was a mess.
  • Score and slip: The instructor showed us how to “score” the edges of the coils (basically scratching them up) and then use “slip” (watery clay) like glue to stick them together. I found it satisfying to smooth the coils with my finger.
  • Building up: Slowly but surely, my pot started to take shape. It was wobbly and uneven, but it was mine! I kept adding coils, scoring, slipping, and smoothing, until it was about the size I wanted.

Shaping and Smoothing

Once I had the basic shape, I used some simple tools – a wooden rib and a sponge – to smooth out the walls and refine the shape. This part took forever! I kept finding little bumps and imperfections that I wanted to fix. I learned that patience is key in pottery.

Adding a Base and Drainage

We then added the base.

  • I rolled the clay into a flat pancake.
  • I then scored the edges of the pancake and the bottom of my pot, and used slip to joined them together.

My pot looked great, but then, disaster! I forgot to add drainage holes. I used a thin stick to poke them in.

The Waiting Game

After all that work, I had to let my pot dry completely. This is called “bone dry”.It took a few days, and it was hard to be patient! Once it was dry, it went into the kiln for its first firing, called the “bisque” firing. This makes the clay hard and porous, ready for glazing.

Glazing (The Fun Part!)

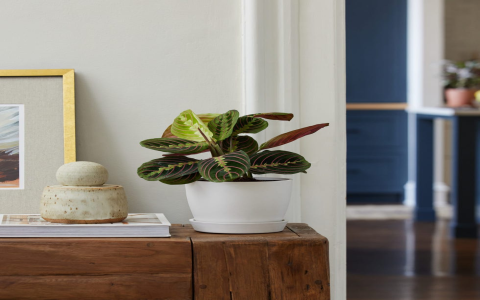
The next week, we got to glaze our pots! I chose a simple, glossy green glaze. I wanted something classic that would look good with any plant. Applying the glaze was a bit tricky – you have to get it evenly coated, but not too thick. I dipped my pot into the glaze bucket and made sure the entire surface was covered.

Cute Ceramic Flowerpot: Best Picks for Your Indoor Plants!

The Final Reveal

Then, it was back into the kiln for the glaze firing. The anticipation was killing me! Finally, the instructor opened the kiln, and there it was – my finished flowerpot! It wasn’t perfect, of course. There were a few drips in the glaze, and it was still a little wobbly, but I was so proud of it. I had made something with my own two hands, from start to finish.

I can’t wait to put a plant in it and add it to my windowsill. Now, if you see me messing around with clay, don’t be surprised, I think I am addicted.

bloommelody

bloommelody

Related Posts

How to use flowerpot b2: Top 5 tips for great plant care.

How to use flowerpot b2: Top 5 tips for great plant care.

by bloommelody
2025-09-13
0

Okay folks, today I’m spillin’ all the tea on my latest adventure – trying not to kill stuff with this Flowerpot B2 thingy I bought. You...

Flowerpot vp9 pink care tips make your plants thrive better

Flowerpot vp9 pink care tips make your plants thrive better

by nnxt
2025-09-09
0

My pink plant was dying and I freaked out So last Tuesday, I walked into my little plant corner ready to water everyone. Total mess. My...

Where to buy Flowerpot VP3 table lamp? (Top places with great prices!)

Where to buy Flowerpot VP3 table lamp? (Top places with great prices!)

by jim
2025-09-01
0

So last week I figured I needed a fancy new table lamp for my desk – you know, something that looks cool but actually works. Kept...

What is and tradition flowerpot lamp? A simple style guide explained!

What is and tradition flowerpot lamp? A simple style guide explained!

by jim
2025-08-27
0

Why I Decided to Try Making a Flowerpot Lamp I saw this weird flowerpot-looking lamp on Pinterest last Tuesday while searching for DIY projects. Looked kinda...

Best rooms for flowerpot ceiling light? See 5 perfect placement ideas inside!

Best rooms for flowerpot ceiling light? See 5 perfect placement ideas inside!

by bloommelody
2025-08-20
0

Okay friends, so I finally got my hands on that cool flowerpot ceiling light everyone’s been posting about. Looked super stylish online, right? But man, I...

Next Post
Protect Your Clematis This Winter! (Easy Care of Clematis in Winter Guide)

Protect Your Clematis This Winter! (Easy Care of Clematis in Winter Guide)

Impatiens Diseases and Pests: How to Spot and Treat Them Fast!

Impatiens Diseases and Pests: How to Spot and Treat Them Fast!

Help! My Ficus Needs Repotting,What should I do?

CATEGORIES

  • Fertilizing
  • Flower Fertilizers & Pesticides
  • Flowerpot
  • Flowers & Plants
  • Gardening Gloves
  • Gardening Knowledge
  • Gardening Scissors
  • Gardening Stand
  • Gardening Tools
  • Light
  • Pests & Diseases
  • Pruning
  • Repotting
  • Shovel
  • Soil
  • Temperature
  • Watering
  • Watering Can

RECOMMENDED

Five Blade Scissors for Herbs: How to Choose the Best One for Your Kitchen
Gardening Scissors

Five Blade Scissors for Herbs: How to Choose the Best One for Your Kitchen

2024-12-27
Stainless steel gardening tools: how to choose? This guide will help you!
Gardening Tools

Stainless steel gardening tools: how to choose? This guide will help you!

2025-01-11
Enchanting Floral Gardening: Nature's Palette

Gardening is actually easy

Elevating Your Gardening Stand: Cultivating a Sanctuary of Wellness and Harmony
17071874890767616772_3_ainote_new
1704070288593363160_7_ainote_new
94339887ba0b48118d17e18d1112938b
pexels-photo-85773
pexels-photo-298246
pexels-david-bartus-43782-714918
pexels-photo-931179
roses-bouquet-congratulations-arrangement-68570
u=1477108710,1302668665&fm=253&fmt=auto&app=138&f=JPEG
  • About
  • Advertise
  • Privacy & Policy

© 2025 Bloom Melody - https://www.bloommelody.com

No Result
View All Result
  • Flowers & Plants
  • Gardening Knowledge
    • Light
    • Watering
    • Fertilizing
    • Pruning
    • Soil
    • Repotting
    • Temperature
  • Pests & Diseases
  • Flower Fertilizers & Pesticides
  • Gardening Tools
    • Flowerpot
    • Gardening Scissors
    • Gardening Gloves
    • Shovel
    • Watering Can
    • Gardening Stand

© 2025 Bloom Melody - https://www.bloommelody.com