
Alright, let me tell you about my latest little crafting adventure: gardening gloves gone floral!
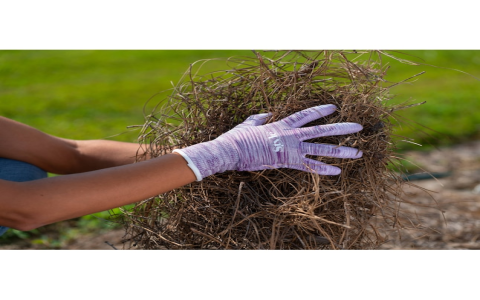
It all started last weekend. I was staring at my old, beat-up gardening gloves – you know, the kind that are more hole than glove at this point. I was about to toss ’em, but then I thought, “Hold on a sec! Maybe I can give these a little makeover.”
So, first things first, I gave those gloves a good scrub. Seriously, they were covered in dirt, grime, and who-knows-what-else. Soap and water did the trick, and I let them dry completely in the sun. This is important; you don’t want to be painting on damp gloves!
Next up, I gathered my supplies. I had some acrylic paints lying around – a bunch of bright, floral colors like pink, purple, yellow, and green. I also grabbed a few different sized paintbrushes, some stencils (I found a pack of floral ones at the craft store), and a sealant spray to protect my masterpiece. And of course, some paper towels for any spills. Trust me, there were spills.
I started by laying the gloves flat on a piece of cardboard. This kept the paint from bleeding through to the other side. Then, using a larger brush, I painted a base coat of light pink all over the gloves. It didn’t have to be perfect, just a nice, even layer to give the floral designs something to stick to. I let that dry for about an hour. Patience is key here!
Once the base coat was dry, the real fun began! I used the stencils to create floral patterns on the gloves. I’d hold the stencil in place with one hand and then use a smaller brush to carefully dab paint onto the glove. I alternated colors and stencil designs to create a sort of wildflower meadow effect. To be honest, the stencils were a bit fiddly, and some of the paint bled through the edges. But hey, that just added to the rustic charm, right?
For the areas where I didn’t use stencils, I just freehanded some simple flower shapes and leaves. Nothing fancy, just little dots and swirls. I even added a few ladybug spots for extra cuteness. It was pretty therapeutic, just letting my creativity flow.
After I was happy with the floral designs, I let the paint dry completely – overnight, just to be safe. Then, I sprayed the gloves with a sealant spray. This is super important because it protects the paint from cracking and fading when you’re actually using the gloves in the garden. I gave them two coats of sealant, letting each coat dry before applying the next.
And that’s it! My old, boring gardening gloves were transformed into a floral work of art. They’re definitely not going to win any fashion awards, but they’re much more cheerful to look at than the plain old ones. Plus, they’re a great conversation starter when I’m out in the garden.
- Scrubbed the gloves
- Painted base coat
- Stenciled floral designs
- Freehanded some flowers
- Applied sealant spray
I’ve been using them for a few weeks now, and the paint is holding up pretty well. The sealant really makes a difference. I might need to touch them up eventually, but for now, they’re perfect.
If you’re looking for a fun and easy way to personalize your gardening gear, I highly recommend giving this a try. It’s a great way to upcycle old gloves and add a little bit of your personality to your gardening routine. Plus, it’s a whole lot cheaper than buying new gloves!


