
So, you know how it is when you’re out in the garden, snipping away, trying to get your trees and shrubs into shape. Pruning’s essential, right? But then you’re left with those open cuts, and you start wondering if you should seal ’em up. For years, I just did what I thought everyone did.
I used to grab those cans of pruning sealer from the local garden center. Seemed like the right thing to do, you know, protect the plant from bugs and diseases and all that jazz. But honestly, after a while, I started feeling a bit iffy about what was actually in those things. Some of them looked like straight-up tar, and I began to think, “Is this really helping, or am I just gumming up the plant’s natural healing process?” Plus, they weren’t exactly cheap, especially if you’ve got a fair bit of pruning to do, like I often do in my little patch.
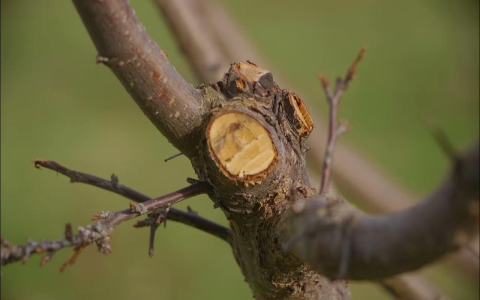
I remember one particular spring, I did a heavy prune on my old plum tree. It’s a good old tree, gives us heaps of fruit. I dutifully slathered that black, sticky commercial sealer on all the larger cuts. Later that season, a couple of those branches didn’t look too happy. They seemed to be struggling a bit more than usual. Now, it could’ve been a bunch of things, I guess, the weather, who knows. But it really got me thinking and questioning that sealer. Was it trapping moisture? Was it preventing the wood from breathing? I didn’t have answers, just a nagging feeling.
So, I started poking around, reading up on more old-school gardening ways, talking to some older folks who’ve been gardening longer than I’ve been alive. And that’s when I stumbled onto the idea of making my own, natural pruning sealer. Seemed a bit rustic at first, maybe even a bit “out there,” but the more I thought about it, the more sense it made. Why put weird chemicals on a plant if you don’t have to?
My Simple Homemade Pruning Sealer Mix
It’s not rocket science, believe me. What I landed on, and what’s worked a treat for me for the past few seasons, is a super simple concoction. You probably have some of this stuff lying around, or it’s easy to get.
Here’s what I typically gather up:
- Clay: Just plain old clay. If you’re lucky enough to have clay soil, you might just dig some up from a clean spot in your garden. I usually buy a small bag of natural pottery clay, the really basic, unadulterated kind. It’s not expensive.
- Well-Rotted Manure or Good Compost: Yep, good old manure. The key here is well-rotted. You don’t want fresh stuff; it can be too strong. Well-rotted cow manure is great. If I don’t have that, I’ll use some of my best, fine-sieved homemade compost. It adds a bit of goodness.
- Water: Just plain tap water to get it to the right consistency.
So, this is how I go about making it. I grab an old bucket or a sturdy plastic container. I don’t really measure exact amounts with cups and spoons; I just kind of eyeball it and go by feel. It’s more art than science, you know?
I’ll start by putting in a good scoop of clay. Let’s say, a couple of big handfuls. Then I add about the same amount, maybe a little less, of the well-rotted manure or fine compost. I break up any lumps in the manure or compost as I add it in.
Then, I start adding water, just a little bit at a time. This is important – add it slowly. And I mix it all up. Honestly, I usually just use my hands for this part. Yeah, it gets messy, but that’s half the fun of gardening, right? A good pair of rubber gloves helps if you’re not keen on getting your hands mucky. I mix and knead it, adding more water bit by bit, until I get a thick paste. You’re aiming for a consistency something like thick peanut butter, or maybe even a bit thicker, like a good, sticky mud pie. It needs to be sticky enough to stay on the branch cut without dripping off, but pliable enough to spread.
Applying the Natural Sealer
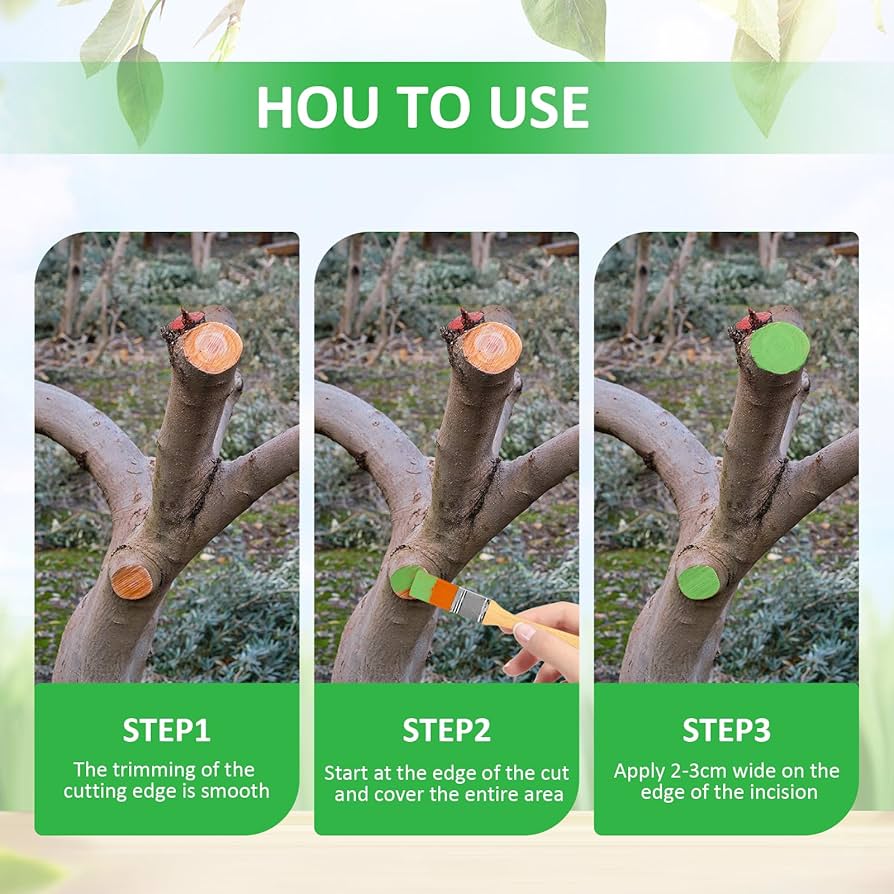
Once I’ve got my paste mixed up to what feels like the right consistency, applying it is dead easy. After I make a pruning cut on a tree or shrub – especially if it’s a larger cut, say, over an inch in diameter – I just take a gob of this homemade sealer. I might use my gloved fingers, or sometimes an old, cheap paintbrush, or even a small wooden spatula or a putty knife. And I just smear it over the cut surface. I make sure it covers the entire wound, right to the edges. Think of it like putting a little protective, earthy bandage on it.
One important thing: I try to apply this sealer fairly soon after making the pruning cut. I don’t like to leave large wounds exposed to the air, rain, and potential pests for too long. So, I usually mix up a batch before I start a big pruning session, or right after.
What I’ve Noticed
And you know what? It works wonderfully for me. I’ve been using this natural method for several seasons now. The clay-manure paste dries on the cut and forms a kind of natural, breathable barrier. It doesn’t look as “neat” or uniform as those shiny black commercial sealers, of course. It looks like what it is – a patch of dried mud. But I’ve noticed the plants seem to heal up very well underneath. The callus tissue forms nicely around the edges of the cuts.
I haven’t had any major issues with diseases getting into the cuts I’ve treated this way. And the best part? It feels good knowing I’m not slathering mystery chemicals or petroleum-based products all over my precious plants. This natural sealer just slowly biodegrades and washes away over time, becoming part of the soil again. No harm, no foul.
So yeah, that’s my little journey and practical experience with making and using a natural pruning sealer. It’s incredibly cheap – practically free if you have clay and compost. It’s easy to make, and it feels much more in tune with a natural, sustainable way of gardening, at least to me. Maybe give it a try next time you’re out there with your loppers and saw. You might be pleasantly surprised.
Of course, it’s not for everyone, I suppose. Some very experienced gardeners swear by leaving most pruning cuts to heal naturally without any sealer at all, especially smaller cuts, arguing that trees have evolved to do this. And there’s a lot of merit to that viewpoint too. But for larger cuts, or on certain types of trees, or even just when I’m feeling like giving a bit of extra care and attention, this homemade, natural stuff is my go-to solution now. It’s simple, effective, and aligns with my desire to garden a bit more gently on the earth.


