
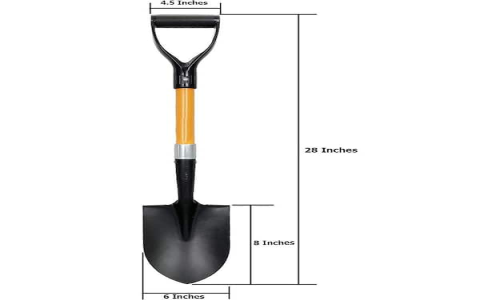
Alright, so check this out, I had this old shovel laying around, right? Just a regular, run-of-the-mill shovel, but I was always struggling to get a good grip on it, especially when moving heavy stuff like wet soil or mulch. My back would be killing me after just a few minutes.
So, I started thinking, “What if I added another handle to this thing?” I figured it would give me more leverage and distribute the weight better. Sounded good in my head, anyway.

Step 1: The Idea & Gathering Supplies
- First, I grabbed the shovel. Obviously.
- Then, I went rummaging through my garage and found a piece of old metal pipe. It was about a foot long and just the right diameter to use as a handle. Score!
- Next, I needed something to attach the pipe to the shovel’s shaft. I found some heavy-duty U-bolts and metal brackets in my hardware stash.
- Of course, I needed tools. I grabbed my drill, a metal saw, a wrench, and some sandpaper. Safety first, so I also snagged my safety glasses and work gloves.
Step 2: Preparing the Handle & Shaft
- I used the metal saw to cut the pipe to the exact length I wanted for the extra handle.
- Then, I used sandpaper to smooth down the edges of the cut pipe so I wouldn’t slice my hands open. No one wants that!
- Next, I figured out where I wanted to position the extra handle on the shovel’s shaft. I marked the spot with a marker.
Step 3: Attaching the Handle
- This was the tricky part. I used the U-bolts and metal brackets to clamp the pipe handle to the shovel’s shaft.
- I had to drill a few holes in the brackets to line them up properly. It took a little bit of fiddling, but I eventually got it all lined up.
- Then, I tightened the U-bolts down with the wrench. I made sure everything was super secure, because I didn’t want the handle to come loose when I was using it.
Step 4: Testing & Fine-Tuning
- Once the handle was attached, I took the shovel outside for a test drive.
- I loaded it up with some heavy dirt and started shoveling. The extra handle made a HUGE difference! It was way easier to lift and control the shovel.
- I noticed that the handle was a little wobbly, so I tightened the U-bolts even more. That seemed to do the trick.
Step 5: The Final Result
And that’s it! I now have a shovel with an extra handle. It might not be the prettiest thing in the world, but it’s definitely functional. My back is thanking me already!
Lessons Learned:
- Measure twice, cut once. I almost messed up the length of the handle, but I caught myself just in time.
- Don’t be afraid to experiment. I wasn’t sure if this project would even work, but I’m glad I gave it a shot.
- Sometimes the simplest solutions are the best. An extra handle made a world of difference.
So, if you’re tired of struggling with your shovel, give this a try. It’s a pretty easy project, and it could save you a lot of back pain.


