

Getting Started with the Nelson Automatic Dog Waterer
Okay, so I finally got tired of constantly checking and refilling the dog’s water bowl, especially on hot days or when we’re out for a bit. Decided to try one of those automatic waterers. Picked up a Nelson model, heard they were pretty tough.
When the box arrived, I pulled it out. Seemed sturdy enough, mostly metal construction which I liked. Not a lot of complicated parts, just the bowl, the valve cover, and the float mechanism inside. Looked simple, which is good in my book.
The Installation Job
First thing, I had to figure out where to put this thing. I wanted it outside, near the back faucet, so connecting it wouldn’t be a massive plumbing project. Found a good spot on the patio wall, close enough to the hose bib.
Next, gathered up my tools. Didn’t need much:
- An adjustable wrench
- Some plumber’s tape (Teflon tape)
- A drill and masonry bits (because I was mounting on brick)
- Wall anchors and screws (came with the waterer, thankfully)
- A level, just to make sure it wasn’t crooked
Mounting it came first. I held the waterer against the wall where I wanted it, used the level to get it straight, and marked the spots for the drill holes. Drilling into brick is always a bit of a pain, slow and steady. Got the holes drilled, tapped in the wall anchors that came with it.
Then, I lined up the waterer and screwed it tight to the wall. Gave it a wiggle. Seemed solid.
Connecting the water was next. This Nelson model connects pretty easily, usually with a hose connection. I decided to use a short, heavy-duty garden hose leader to connect from the nearby faucet to the waterer’s inlet. Unscrewed the cap on the waterer’s inlet valve. Wrapped some Teflon tape around the threads on the hose end and the faucet end – always do this, helps prevent leaks. Tightened the hose onto the faucet first, then connected the other end to the waterer’s inlet. Used the wrench to snug both connections up, but not crazy tight – don’t want to strip anything.
Turning it On and Testing
Alright, moment of truth. I slowly turned the faucet on. Water started flowing into the bowl. I watched the float inside lift up as the water level rose. It clicked off right when the bowl was nearly full, just like it’s supposed to. Success!
I spent a few minutes just watching it. Checked the hose connections for any drips. None. Checked around the valve mechanism inside the waterer cover. Dry as a bone. Good stuff.
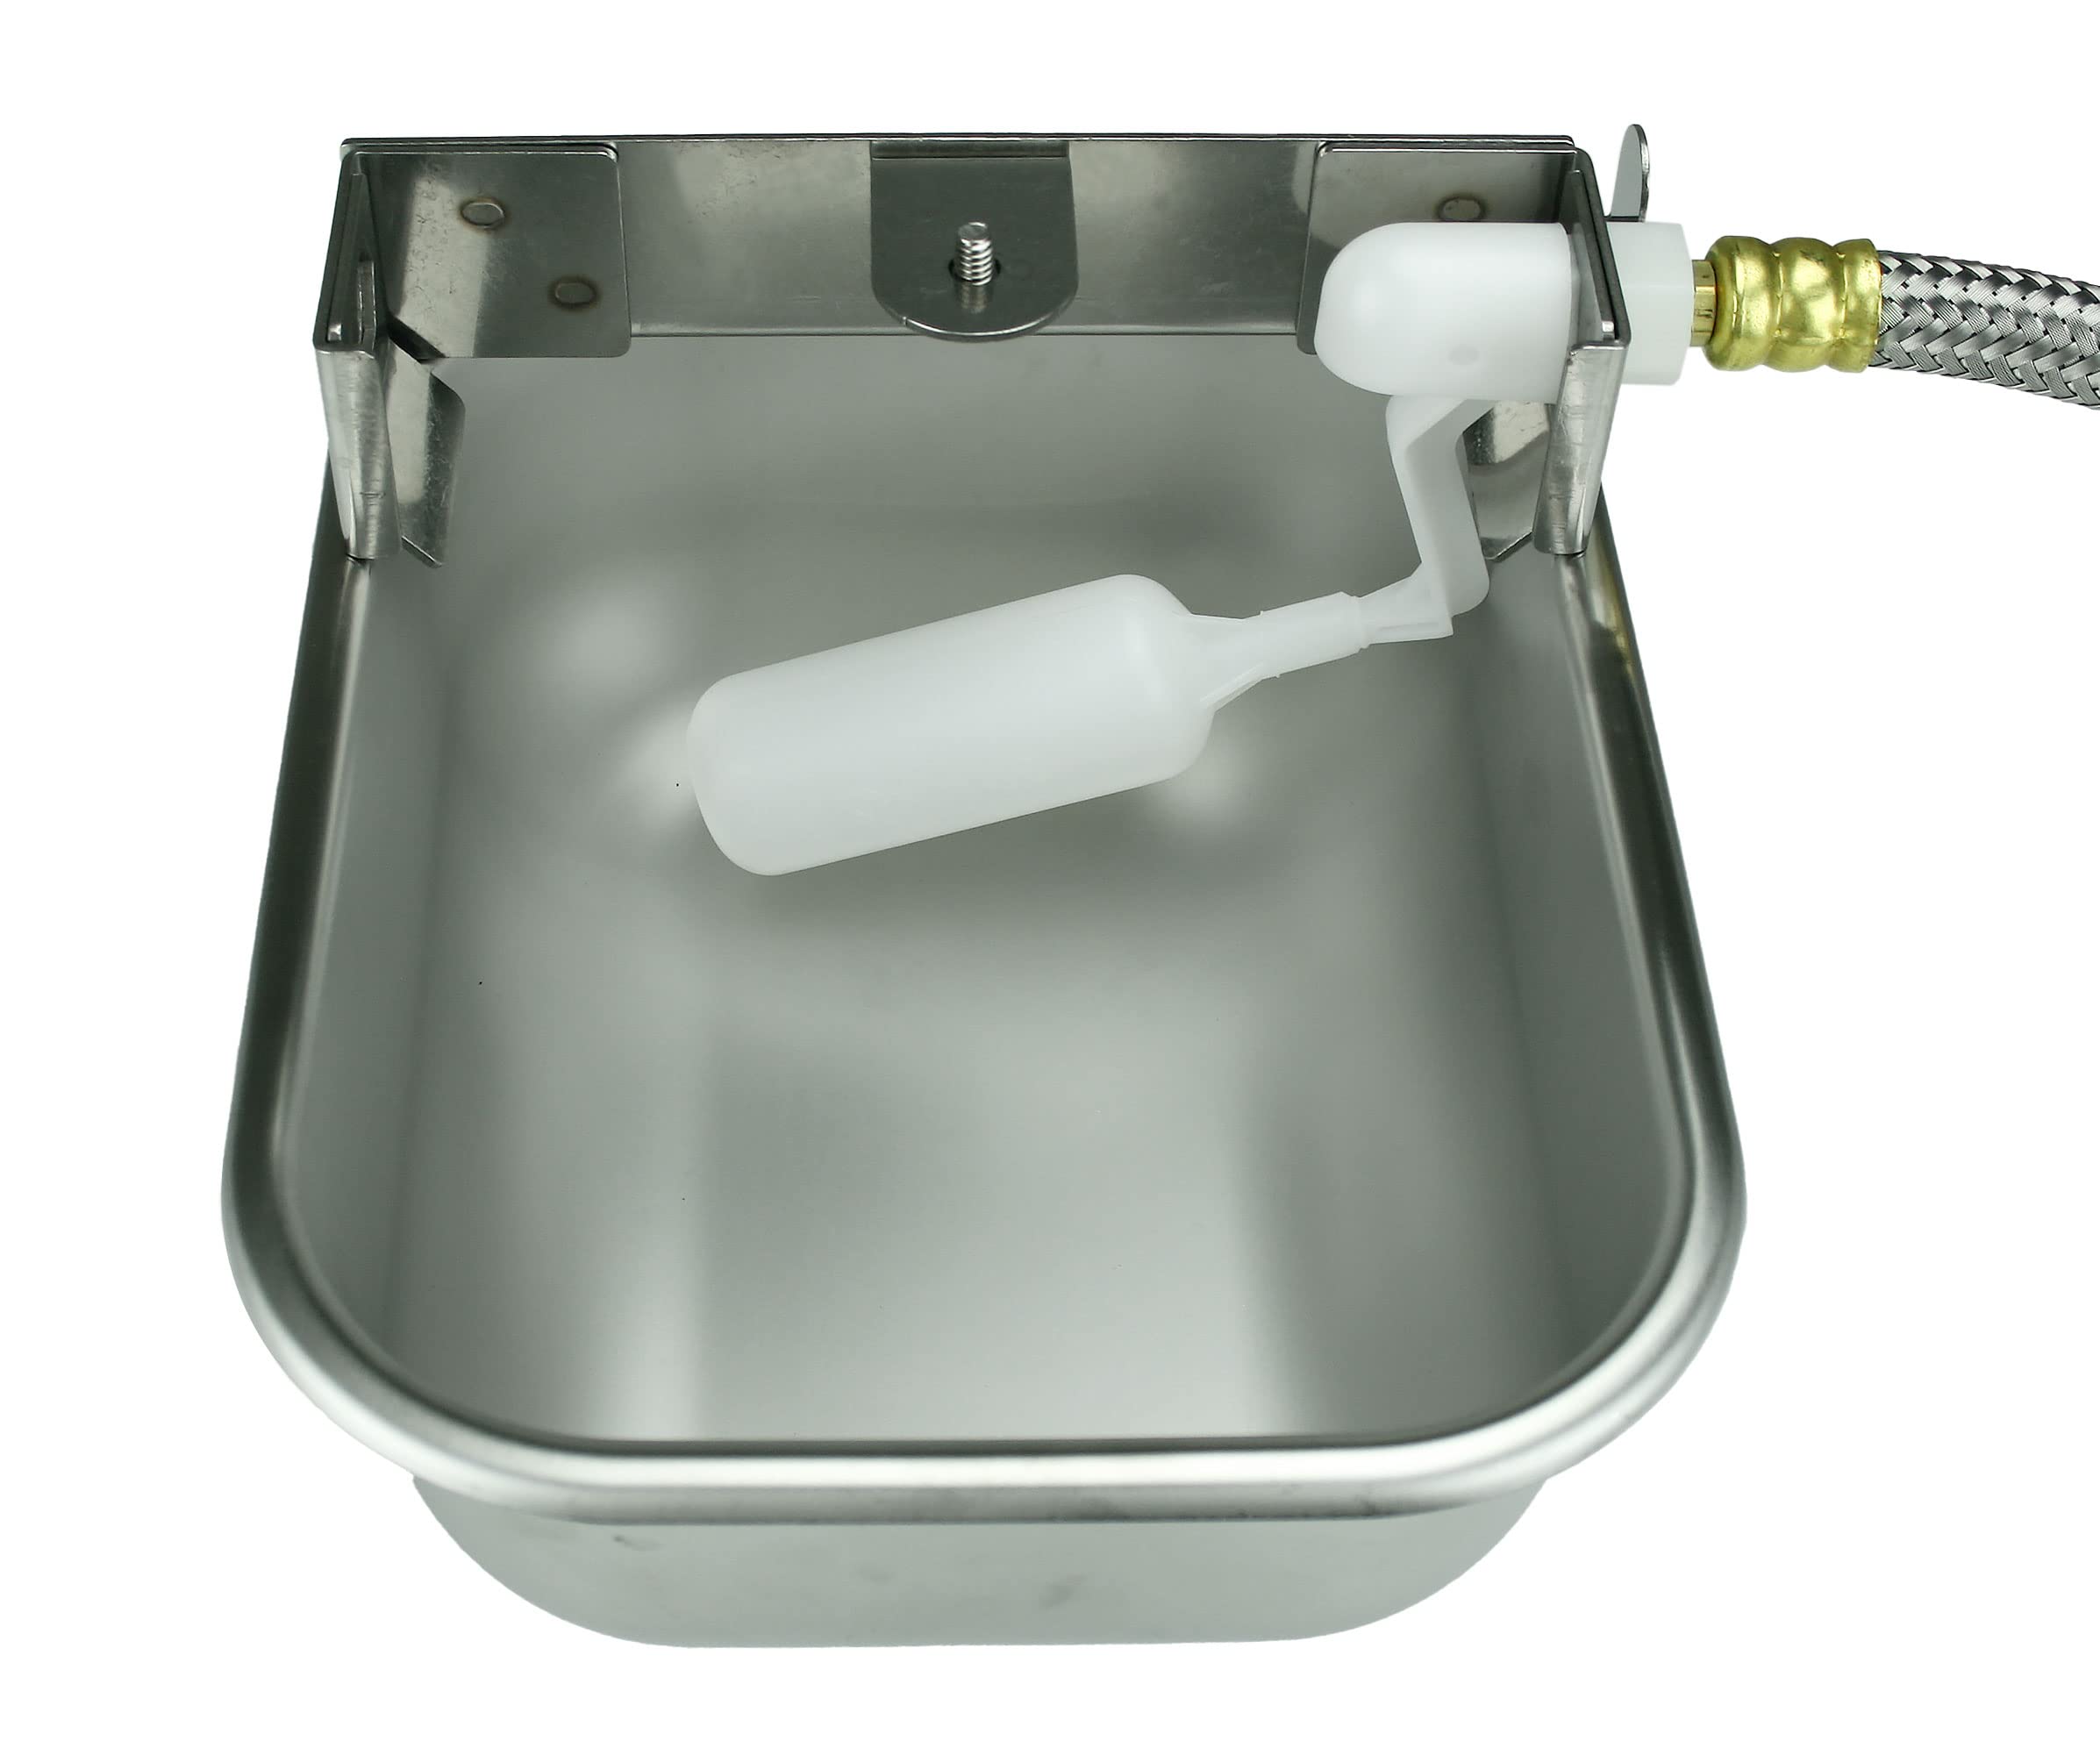
To test the refill, I scooped some water out of the bowl. The float dropped, the valve opened, and it filled right back up again, stopping at the same level. Perfect.
Dog’s First Look
Brought the dog over. He gave it a good sniff. Looked at it, looked at me. Seemed a bit unsure at first, which is normal. I splashed the water a bit. After a minute or two, he took a tentative sip. Then drank normally. Guess he approved.
Final Thoughts
So far, so good. It’s been running for a while now, keeps the water bowl full automatically. No more forgetting, no more finding an empty bowl. The metal construction feels like it will last way longer than the plastic ones I’ve seen. Installation wasn’t too bad, maybe took me 30-40 minutes total, mostly just the drilling part. Definitely solves the problem I had. Happy dog, happy me.


