
Alright, let me walk you through how I put together this vp10 flowerpot thing the other day. It wasn’t super complicated, but like anything, you gotta go step-by-step.
Getting Started
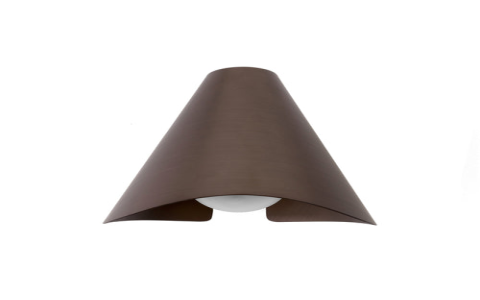
First off, I had this idea, or maybe I saw a picture somewhere, of a neat little pot design. Found a file for it, I think it was called something like vp10_*. Just a standard 3D model file, you know.
So, I downloaded that onto my computer. The first real action was getting it ready for my 3D printer.
Prepping the Print
I opened up my usual slicing software – the program that turns the 3D model into instructions the printer understands. Dragged the vp10 file into it. It popped up on the virtual build plate.
Took a good look at it. Rotated the view, zoomed in. Seemed okay structurally. Didn’t need to make it bigger or smaller, the size looked about right for a small desk plant.
Then came the settings. What I usually do:
- Material: Just used some basic PLA filament I had plenty of. Think it was grey.
- Layer Height: Went with 0.2mm. Standard stuff, nothing fancy.
- Infill: Maybe 15%? Didn’t need it super strong, it’s just holding dirt.
- Supports: Didn’t look like it needed any, the shape was simple enough.
- Drainage: Made sure the little hole at the bottom was definitely going to print open. That’s important for a flowerpot, right?
Once I dialled those settings in, I hit the ‘Slice’ button. Watched the progress bar. It chewed on the file for a minute or two and then spat out the G-code file. Saved that straight onto my printer’s SD card.
Printing Process
Walked over to my trusty 3D printer. It was off, so powered it up. While it was booting, I made sure the grey PLA spool wasn’t tangled and fed the end into the extruder.
Used the printer’s menu to preheat for PLA. Had to wait a few minutes for the nozzle and bed to get up to temperature. You know the drill.
Popped the SD card in. Navigated the little screen to find the vp10_* file. Selected it and hit ‘Print’.
Now, the important part: watching that first layer. You gotta make sure it sticks to the bed properly, otherwise the whole print can fail later. Stared at it while it laid down the first few lines. Looked like it was sticking okay. Good adhesion.
After that, I pretty much just let it do its thing. Checked back every hour or so. Heard it humming away in the corner. Took maybe, I don’t know, 4 or 5 hours? Something like that.
Finishing Up
Eventually, the printer finished and went quiet. The nozzle moved away, the bed started cooling.
Waited a bit for the bed to cool down – makes it easier to get the print off. Then, carefully slid my removal tool under the edge of the flowerpot and popped it off the build plate.
Held it in my hand. Felt solid. Looked pretty much like the picture. Had some minor stringing, those thin wispy bits of plastic. Grabbed my clippers and cleaned those off. Checked the drainage hole again – yep, clear all the way through.
So there it was, a finished vp10 flowerpot, printed in grey plastic. Looked alright. Nothing spectacular, but functional.
Last step? Grabbed a small succulent I had, got some potting mix, and actually planted it in the pot. Put it on the windowsill. Done deal. Another little project finished.


