Enchanting Floral Gardening: Nature's Palette
  • Flowers & Plants
  • Gardening Knowledge
    • Light
    • Watering
    • Fertilizing
    • Pruning
    • Soil
    • Repotting
    • Temperature
  • Pests & Diseases
  • Flower Fertilizers & Pesticides
  • Gardening Tools
    • Flowerpot
    • Gardening Scissors
    • Gardening Gloves
    • Shovel
    • Watering Can
    • Gardening Stand
No Result
View All Result
Enchanting Floral Gardening: Nature's Palette
No Result
View All Result
Home Repotting

Wondering how to repot cymbidium orchids? Find out the best time and tips for success.

jim by jim
2025-04-15
in Repotting
0
Wondering how to repot cymbidium orchids? Find out the best time and tips for success.
Share on FacebookShare on Twitter

Okay, let’s talk about getting my Cymbidium orchid into a new pot. It was definitely time. The old mix looked spent, and the plant seemed a bit cramped.

Getting Ready

First thing, I gathered all my stuff. You don’t want to start and then realize you’re missing something. Here’s what I pulled together:

Related articles

Fix Droopy Plants After Repotting with These 3 Proven Tips!

Repotting a Norfolk Pine Made Easy Simple Step by Step Guide

Wondering how to repot cymbidium orchids? Find out the best time and tips for success.
  • A new pot, just slightly bigger than the old one. Maybe an inch or two wider. Didn’t want to give it too much space.
  • Fresh orchid potting mix. I use a chunky bark mix specifically for Cymbidiums. They seem to like good drainage.
  • Clean scissors or pruning shears. Sterilized them with a bit of rubbing alcohol first. Don’t want to spread any gunk.
  • A chopstick or a thin stake. Handy for poking mix into gaps.
  • Something to work on, like newspaper or an old tarp. It gets messy.
  • Gloves, if you don’t like getting your hands dirty. I usually just go for it.

The Actual Repotting Process

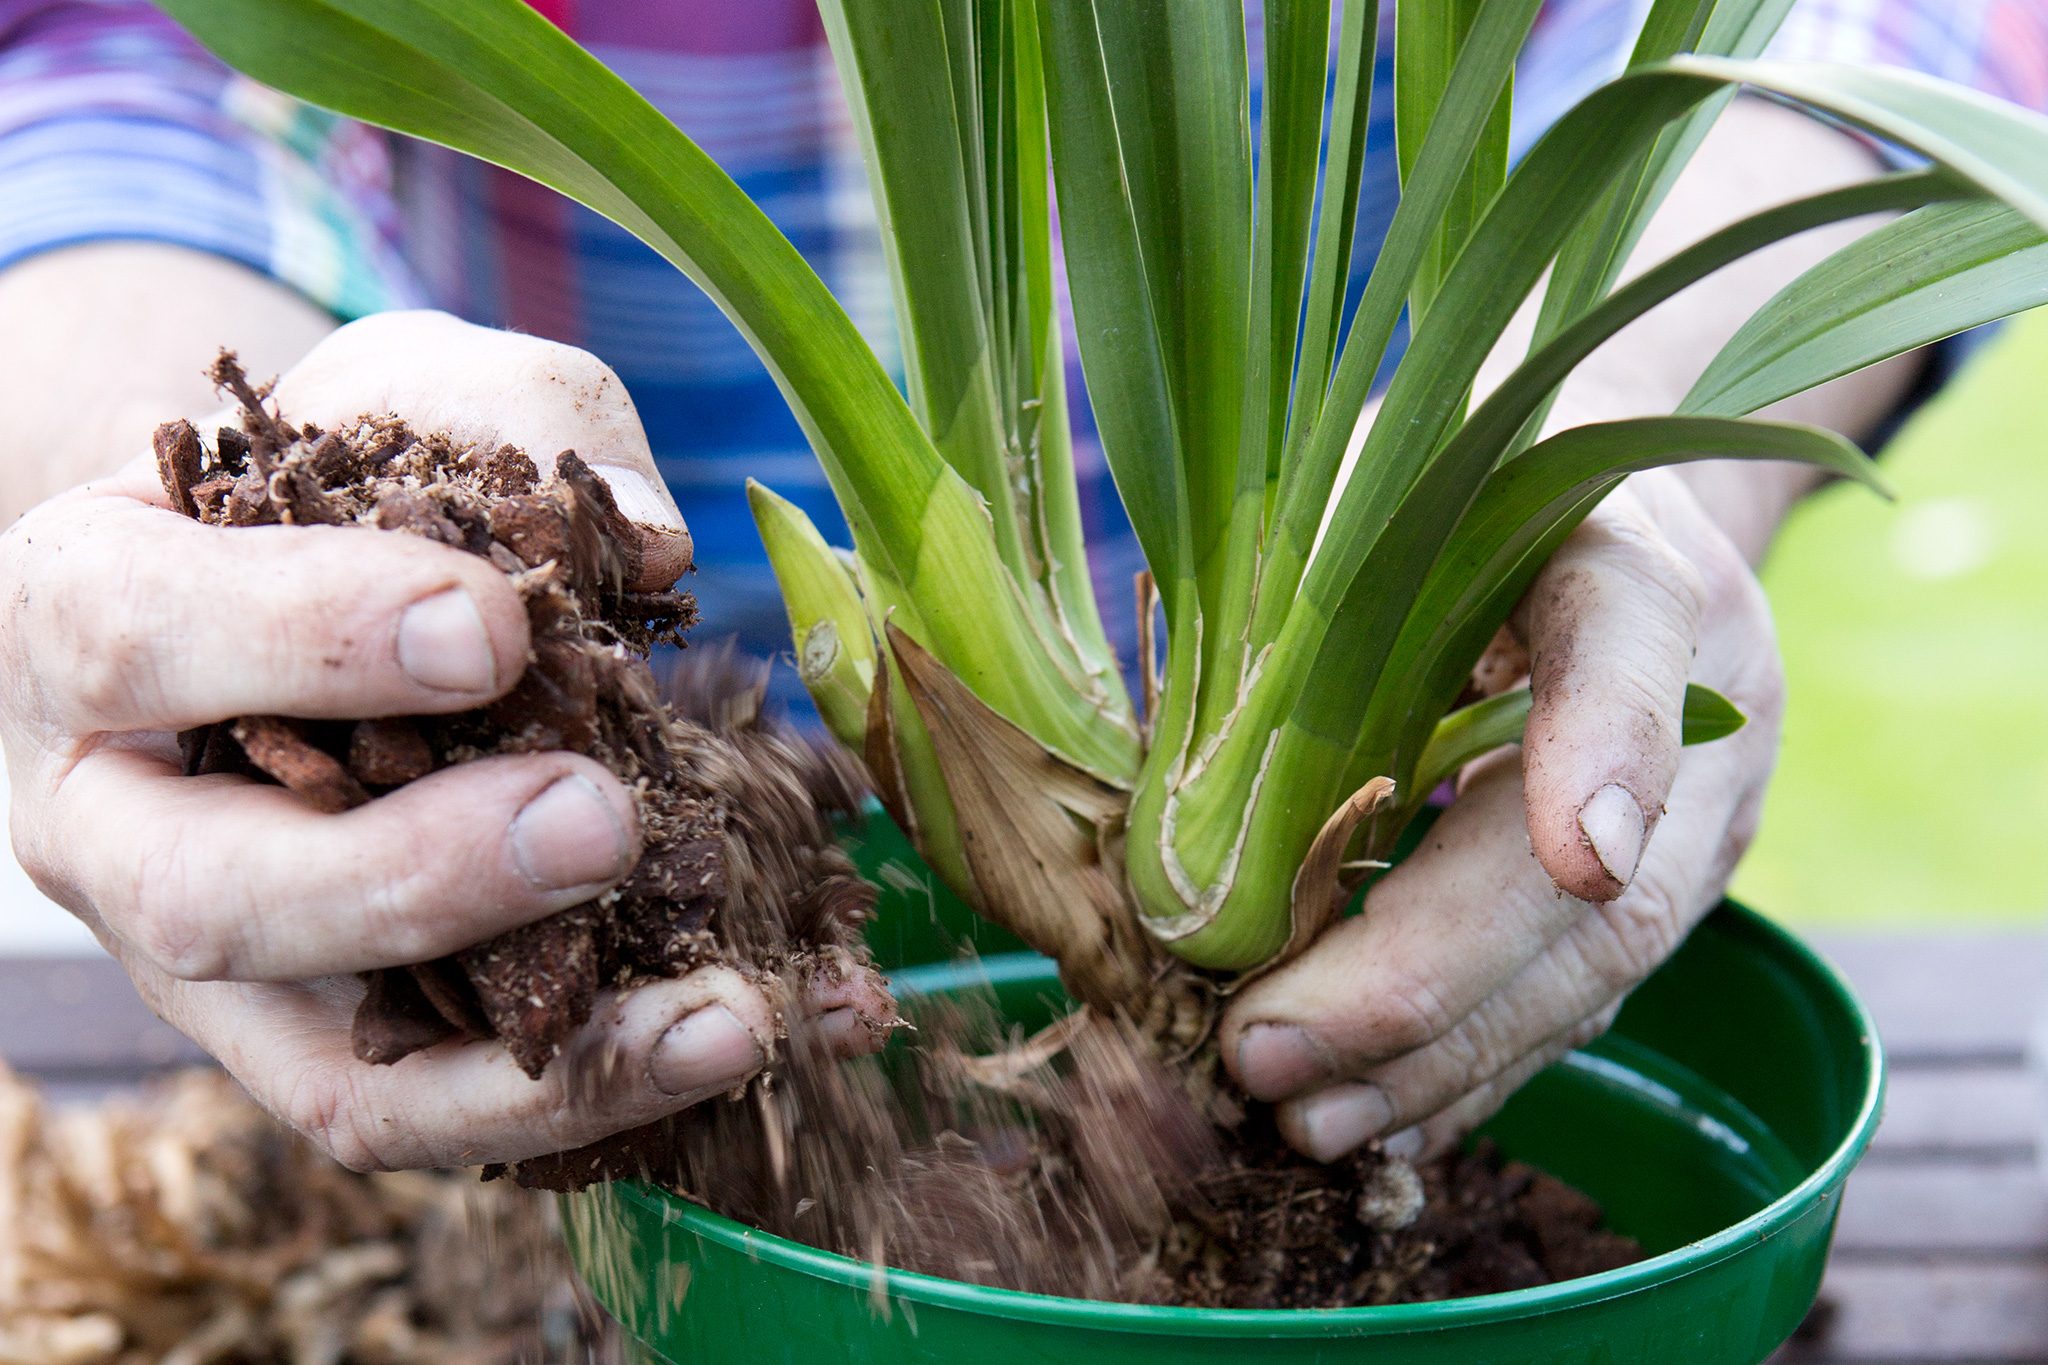
Alright, so the first step was getting the orchid out of its old pot. Sometimes they slide right out, other times… not so much. This one was pretty root-bound. I had to squeeze the plastic pot quite a bit and gently wiggle the plant back and forth. Took some patience, but eventually, it came loose. Had to be careful not to break too many roots or damage the pseudobulbs.

Once it was out, wow, lots of roots. I started gently teasing apart the old mix from the root ball. A lot of the old bark just crumbled away, which is good, means it was time for a change. Then I inspected the roots closely. I look for anything mushy, black, or papery-dry. Those are dead or rotting. I took my clean shears and snipped off all the bad stuff. Healthy Cymbidium roots are usually whitish or light tan and firm. Don’t be afraid to trim, just make sure your tool is clean.

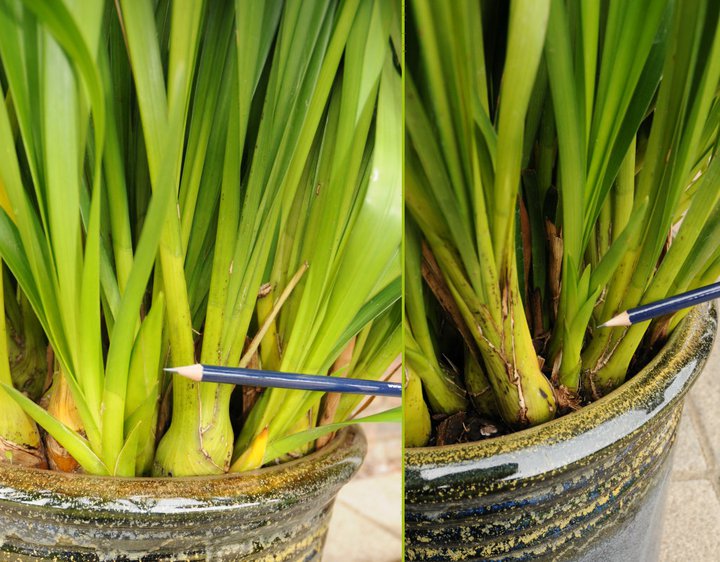
Next, I got the new pot ready. I put a layer of the fresh bark mix in the bottom. Just enough so the base of the orchid would sit at the right height – usually, you want the bottom of the oldest pseudobulbs to be just slightly below the rim of the pot.

Then, I carefully placed the orchid into the new pot. I tried to position the oldest pseudobulbs towards the back edge of the pot, leaving more room in front for the new growth to develop. This is pretty important for Cymbidiums because they grow in one direction.

Holding the orchid in place with one hand, I started adding the new potting mix around the roots with the other. I filled it in, gently tapping the pot on the table and using the chopstick to poke the mix down into any big air pockets. You want the mix to support the plant, but don’t pack it down super tight. Cymbidiums need air around their roots.

I kept adding mix until it reached the base of the pseudobulbs, making sure they weren’t buried. A little wiggle test confirmed the plant felt secure in its new home.

What I Did After

Now, this is where people differ, but I usually wait about a week before watering thoroughly. This gives any roots I might have accidentally nicked or broken time to heal over, reducing the chance of rot. Some folks water right away, but this method has worked well for me.

Wondering how to repot cymbidium orchids? Find out the best time and tips for success.

After that first week, I gave it a good soak, letting water run through the pot completely. Then I put it back in its usual spot – bright, indirect light, nothing too harsh. And that’s pretty much it. Just gotta keep an eye on it and get back to its normal watering routine once it seems settled.

It always feels good to give them fresh mix and a bit more room. Hopefully, it’ll thank me with some nice blooms next season!

jim

jim

Related Posts

Fix Droopy Plants After Repotting with These 3 Proven Tips!

Fix Droopy Plants After Repotting with These 3 Proven Tips!

by bloommelody
2025-09-15
0

Ugh, I totally messed up last week. Got this gorgeous fern for my birthday, right? Looked super happy in its little plastic pot. I was excited...

Repotting a Norfolk Pine Made Easy Simple Step by Step Guide

by jim
2025-09-08
0

Okay, so my big Norfolk Pine started lookin’ kinda sad last week. Leaves droopin’, and I spotted roots poking out the drainage hole like tiny escape...

Why Repotting a Ficus Bonsai Matters: Essential Care Secrets!

Why Repotting a Ficus Bonsai Matters: Essential Care Secrets!

by bloommelody
2025-08-24
0

Why Mess With Repotting? Alright, so today was the day for my big Ficus Microcarpa. It’d been sitting in that same old pot looking kinda sad...

Gaura Belleza Dark Pink Dry After Repotting How to Save Your Plant Fast

Gaura Belleza Dark Pink Dry After Repotting How to Save Your Plant Fast

by bloommelody
2025-08-23
0

Alright friends, let me tell you about my near-disaster with the Gaura Belleza Dark Pink last Tuesday. I saw it sitting there looking sad in its...

Best Orchid Repotting Kits This Year Affordable Good Choices

Best Orchid Repotting Kits This Year Affordable Good Choices

by bloommelody
2025-07-24
0

Why I Needed to Repot My Orchids My old orchids were looking real sad last month. Roots coming out everywhere, leaves turning yellow, and zero blooms...

Next Post
What makes the rainmaker watering can unique? Its special nozzle provides a gentle, rain-like shower.

What makes the rainmaker watering can unique? Its special nozzle provides a gentle, rain-like shower.

Are Inchs Natural Lawn Care reviews positive? Find out what real customers think about their service.

Are Inchs Natural Lawn Care reviews positive? Find out what real customers think about their service.

Jacks Fertilizer 20 20 20: How to Use it Right?

Jacks Fertilizer 20 20 20: How to Use it Right?

CATEGORIES

  • Fertilizing
  • Flower Fertilizers & Pesticides
  • Flowerpot
  • Flowers & Plants
  • Gardening Gloves
  • Gardening Knowledge
  • Gardening Scissors
  • Gardening Stand
  • Gardening Tools
  • Light
  • Pests & Diseases
  • Pruning
  • Repotting
  • Shovel
  • Soil
  • Temperature
  • Watering
  • Watering Can

RECOMMENDED

BDO Fertilizer Guide: Get the Best Yields Now
Fertilizing

BDO Fertilizer Guide: Get the Best Yields Now

2025-04-06
Outdoor Metal Watering Can: How to Choose the Perfect One?
Watering Can

Outdoor Metal Watering Can: How to Choose the Perfect One?

2024-12-14
Enchanting Floral Gardening: Nature's Palette

Gardening is actually easy

pexels-photo-85773
17071874890767616772_3_ainote_new
pexels-photo-931179
roses-bouquet-congratulations-arrangement-68570
u=1477108710,1302668665&fm=253&fmt=auto&app=138&f=JPEG
94339887ba0b48118d17e18d1112938b
1704070288593363160_7_ainote_new
pexels-photo-298246
Elevating Your Gardening Stand: Cultivating a Sanctuary of Wellness and Harmony
pexels-david-bartus-43782-714918
  • About
  • Advertise
  • Privacy & Policy

© 2025 Bloom Melody - https://www.bloommelody.com

No Result
View All Result
  • Flowers & Plants
  • Gardening Knowledge
    • Light
    • Watering
    • Fertilizing
    • Pruning
    • Soil
    • Repotting
    • Temperature
  • Pests & Diseases
  • Flower Fertilizers & Pesticides
  • Gardening Tools
    • Flowerpot
    • Gardening Scissors
    • Gardening Gloves
    • Shovel
    • Watering Can
    • Gardening Stand

© 2025 Bloom Melody - https://www.bloommelody.com