
Okay, so I’ve been getting into gardening lately, and let me tell you, there are a TON of tools out there. It’s overwhelming! But one little thing that’s made a surprising difference is this thing called a “dibbler” – sometimes they call it a “dibble” or “dibber.” It’s basically a pointed stick, but trust me, it’s more useful than it sounds.
Getting Started: My First Dibbler
I started with a cheap one I found, made of plastic. It’s worked, but it’s not very, and I was worried about it breaking, so I am going to buy a new one. I think that I will choose a better quality dibbler.
Putting the Dibbler to Work
The process of using a dibbler is quite simple.
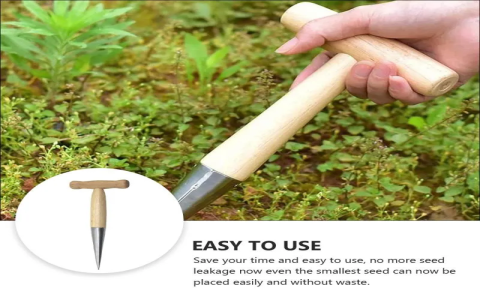
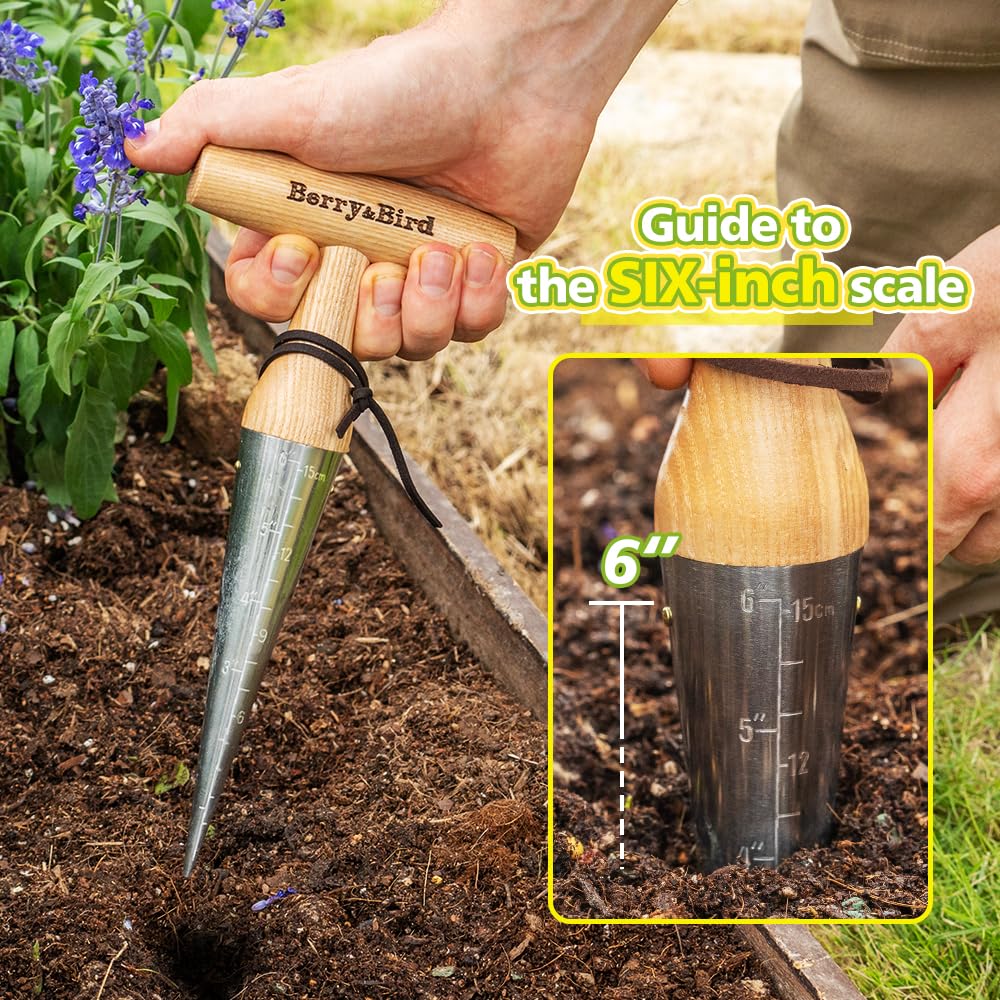
- Poke, poke, poke: I just go along my seed starting tray or the garden bed and use the dibbler to poke holes at the right depth and spacing for my seeds or seedlings. The one I have has these little measurement marks on the side, which is actually pretty handy.
- Drop it in: Once I’ve got my holes, I carefully drop in my seeds or gently place my seedlings in the holes.
- Cover it up:Then I just use my fingers or the side of the dibbler to gently push the soil back over the seeds or around the base of the seedlings. Done!
Why I’m Loving the Dibbler
- Perfect Holes Every Time:No more guessing if my seeds are deep enough! I get consistently sized holes, which means my seeds have a better chance of sprouting evenly.
- Saves My Back (and Knees!):I don’t have to bend over as much when I’m planting a bunch of seeds or seedlings.
- Faster Planting:Honestly, it speeds things up. It’s much quicker than trying to dig individual holes with my fingers or a trowel.
- Less Messy:It keeps things pretty tidy. No more huge clumps of dirt everywhere.
It’s not a fancy tool, but the dibbler is a real workhorse. And, it makes the planting that much easier.


