
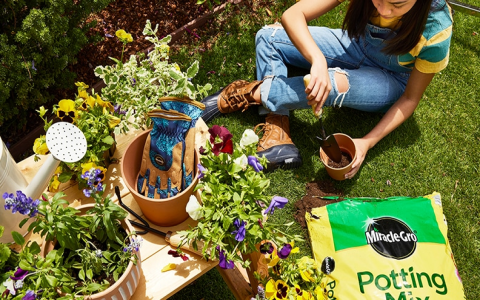
Okay, so yesterday, I decided it was finally time to repot some of my plants. They were looking pretty cramped, and I knew they needed more space to grow. Honestly, I’ve been putting it off, ’cause, well, it can be a bit of a mess. But, let’s be real, healthy plants make a happy me, so I got to it.
Figuring Out the Game Plan
First, I checked which plants actually needed repotting. You know, gently tugging on them to see if the roots were circling the bottom of the pot. Yep, several were definitely root-bound. The poor things!
Gathering Supplies
Then, I got my supplies together. I used:
- New pots (slightly bigger than the old ones, of course)
- Fresh potting mix.
- A trowel.
- Gardening gloves.
- A watering can.
The Repotting Process
Next, I carefully removed each plant from its old pot. Sometimes I had to give the pot a little tap on the side to loosen things up. Then I gently teased apart any circling roots at the bottom – this helps them grow outwards in the new pot. I added some fresh potting mix to the bottom of the new pot, then I placed the plant and adding more soil around the sides, making sure not to pack it too tightly.
Water and TLC
Finally, I gave each newly repotted plant a good watering. I added enought water so that it started draining out the bottom. It is important that the roots can breath.
And that’s it! My plants are now happily settled in their new homes. They look so much better, and I know they’ll thank me for it with lots of new growth. It was a bit of work, sure, but totally worth it.


