
Alright, folks, let’s talk about my little green buddy, the Alocasia Frydek. I picked up this plant a while back, and man, it’s been a bit of a journey figuring out how to keep it happy. But I’ve learned a few things along the way, and I’m here to share my experience.
Getting Started
First off, when I brought my Frydek home, I placed it in a spot with a lot of bright, indirect light. I’ve got this east-facing window that gets good morning sun, and I figured that would be perfect. I learned that direct sunlight can be a bit too harsh, so I made sure it was filtered through a sheer curtain.

Watering Adventures
Watering was a bit tricky at first. I read somewhere that these plants like to stay moist, but not soggy. So, I started by watering it whenever the top inch of the soil felt dry. I used my finger to check, just poked it in there to see how it felt. I also made sure the pot had good drainage because I didn’t want the roots sitting in water.
Creating a Humid Haven
Now, these Frydeks love humidity. My place can get a bit dry, especially in the winter with the heater on. So, I got myself a little humidifier and placed it near the plant. I also tried grouping it with some of my other plants to create a bit of a humid microclimate. Sometimes, I’d give it a good misting with a spray bottle, just to keep things a little more tropical.
Mixing the Perfect Soil
I repotted my Frydek after a while, and I made my own soil mix. I used regular potting soil, but I added some perlite and orchid bark to make it airy and well-draining. I wanted something that would hold moisture but also let the roots breathe. It seemed to like the new mix, at least it didn’t complain!
Feeding Time
During the growing season, I fed my Frydek with a diluted liquid fertilizer. I did this about once a month. I didn’t want to overdo it, so I used about half the recommended strength. It seemed to appreciate the extra nutrients, and I noticed it pushing out new leaves more often.
Keeping an Eye Out
I also kept an eye out for any signs of trouble. Sometimes, I’d notice the leaves getting a bit yellow, which usually meant I was overwatering. Other times, the edges would get crispy, which was a sign that it needed more humidity. It was a bit of a learning curve, but I started to understand what my Frydek was telling me.
Results
- New Growth: After a few months, I started seeing some real progress. My Frydek was putting out new leaves, and they were looking healthy and vibrant.
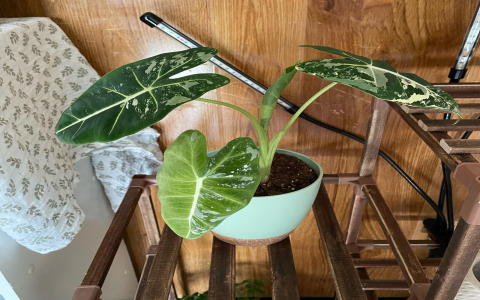
- Happy Plant: Overall, the plant seemed much happier. It was standing tall, the leaves were a beautiful deep green with those striking white veins, and it just looked like it was thriving.
- Learning Experience: It’s been a rewarding experience figuring out how to care for this plant. I wouldn’t say I’m an expert now, but I definitely feel more confident in my plant-parenting skills.
So, that’s my Alocasia Frydek care story. It’s not rocket science, but it does take a bit of attention and care. If you’re thinking about getting one of these beauties, just be prepared to give it some love, and you’ll be rewarded with a stunning plant that really brightens up your space.


