
Hey everyone, it’s your boy back again with another fun little project! Today, I’m gonna show you how I made a flowerpot candle. It sounds kinda weird, but trust me, it turned out pretty neat and was actually way easier than I thought it would be. So, let’s jump right into it, shall we?
First off, I gathered all the stuff I needed. I picked up some regular old terracotta flower pots from the garden store – nothing fancy, just the standard ones. Then, I grabbed some candle wax, wicks, and some essential oils for fragrance. I also made sure I had a double boiler setup for melting the wax, a thermometer, and some wooden skewers to hold the wicks in place. Oh, and some old newspapers to protect my workspace, ’cause you know, wax can get messy.
Once I had everything laid out, I started by prepping the flower pots. I gave them a good rinse and let them dry completely. While they were drying, I moved on to melting the wax. I used a double boiler because you really don’t want to heat the wax directly, it can get dangerous. I clipped the thermometer to the side of the pot to keep an eye on the temperature, aiming for around 180-185 degrees Fahrenheit. It’s not rocket science, just don’t let it boil over!
- Prep the pots: Rinse and dry the flower pots thoroughly.
- Melt the wax: Use a double boiler to melt the wax, monitoring the temperature.
- Add fragrance: Stir in essential oils once the wax is melted.
- Secure the wicks: Use skewers to center the wicks in the pots.
- Pour the wax: Carefully pour the wax into the pots, leaving some space at the top.
- Let it cool: Allow the candles to cool completely before trimming the wicks.
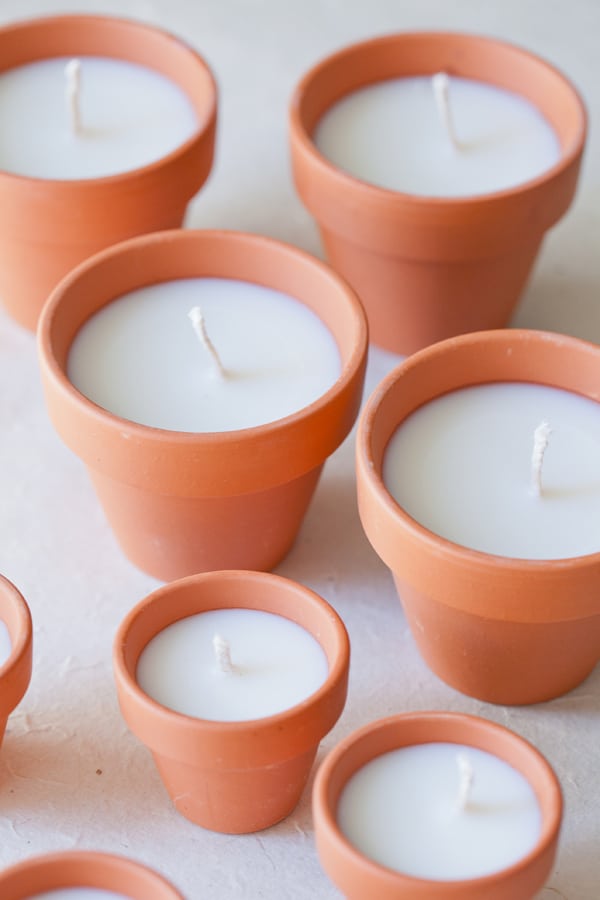
When the wax was all melted and at the right temperature, I stirred in some lavender essential oil. You can use whatever scent you like, or none at all if that’s your thing. Then came the slightly tricky part – getting the wicks in place. I took a wooden skewer and tied the wick to it, making sure it hung straight down into the pot. Then I carefully poured the melted wax into each flower pot, leaving a little bit of space at the top.
After pouring, I just let the candles sit and cool down completely. This took a few hours, so I went and did other stuff in the meantime. Once they were solid, I trimmed the wicks down to about a quarter of an inch. And that’s pretty much it! I ended up with these cute little flowerpot candles that not only look nice but also smell amazing.
Final Thoughts
Honestly, this was a super chill project, and it’s a great way to add a personal touch to your home or even make gifts for friends and family. Plus, it’s kind of therapeutic to just mess around with wax and scents. If you’re looking for a simple, fun DIY, definitely give this one a try. You might surprise yourself with how crafty you can be!


