Enchanting Floral Gardening: Nature's Palette
  • Flowers & Plants
  • Gardening Knowledge
    • Light
    • Watering
    • Fertilizing
    • Pruning
    • Soil
    • Repotting
    • Temperature
  • Pests & Diseases
  • Flower Fertilizers & Pesticides
  • Gardening Tools
    • Flowerpot
    • Gardening Scissors
    • Gardening Gloves
    • Shovel
    • Watering Can
    • Gardening Stand
No Result
View All Result
Enchanting Floral Gardening: Nature's Palette
No Result
View All Result
Home Repotting

Aloe Repotting: When and How to Repot (Easy Tips for Beginners!)

nnxt by nnxt
2025-01-15
in Repotting
0
Aloe Repotting: When and How to Repot (Easy Tips for Beginners!)
Share on FacebookShare on Twitter

Okay, so, I’ve been meaning to repot my aloe plant for a while now. It’s been in the same pot for ages, and honestly, it’s looking a little cramped. I figured it was time to give it a new home.

First things first, I had to find a new pot. I remembered reading something about choosing a pot that was just a little bigger than the old one. So, I went to the store and picked out a nice terra cotta pot that seemed like it would do the trick. It also had a drainage hole at the bottom, which is super important for aloe plants.

Related articles

Best Orchid Repotting Kits This Year Affordable Good Choices

Need repot plants near me? Learn steps to choose a shop quick.

Aloe Repotting: When and How to Repot (Easy Tips for Beginners!)
  • Went to the store.
  • Picked out a new terra cotta pot.
  • Made sure it was slightly bigger than the old one.
  • Checked for a drainage hole.

Next, I gathered my other supplies. I got some new potting mix, specifically for succulents and cacti, because I know aloe plants like soil that drains really well. Also, I grabbed my gardening gloves because I didn’t want to get my hands all dirty and poked by the aloe’s spiky leaves.

  • Got some succulent/cacti potting mix.
  • Grabbed my gardening gloves.

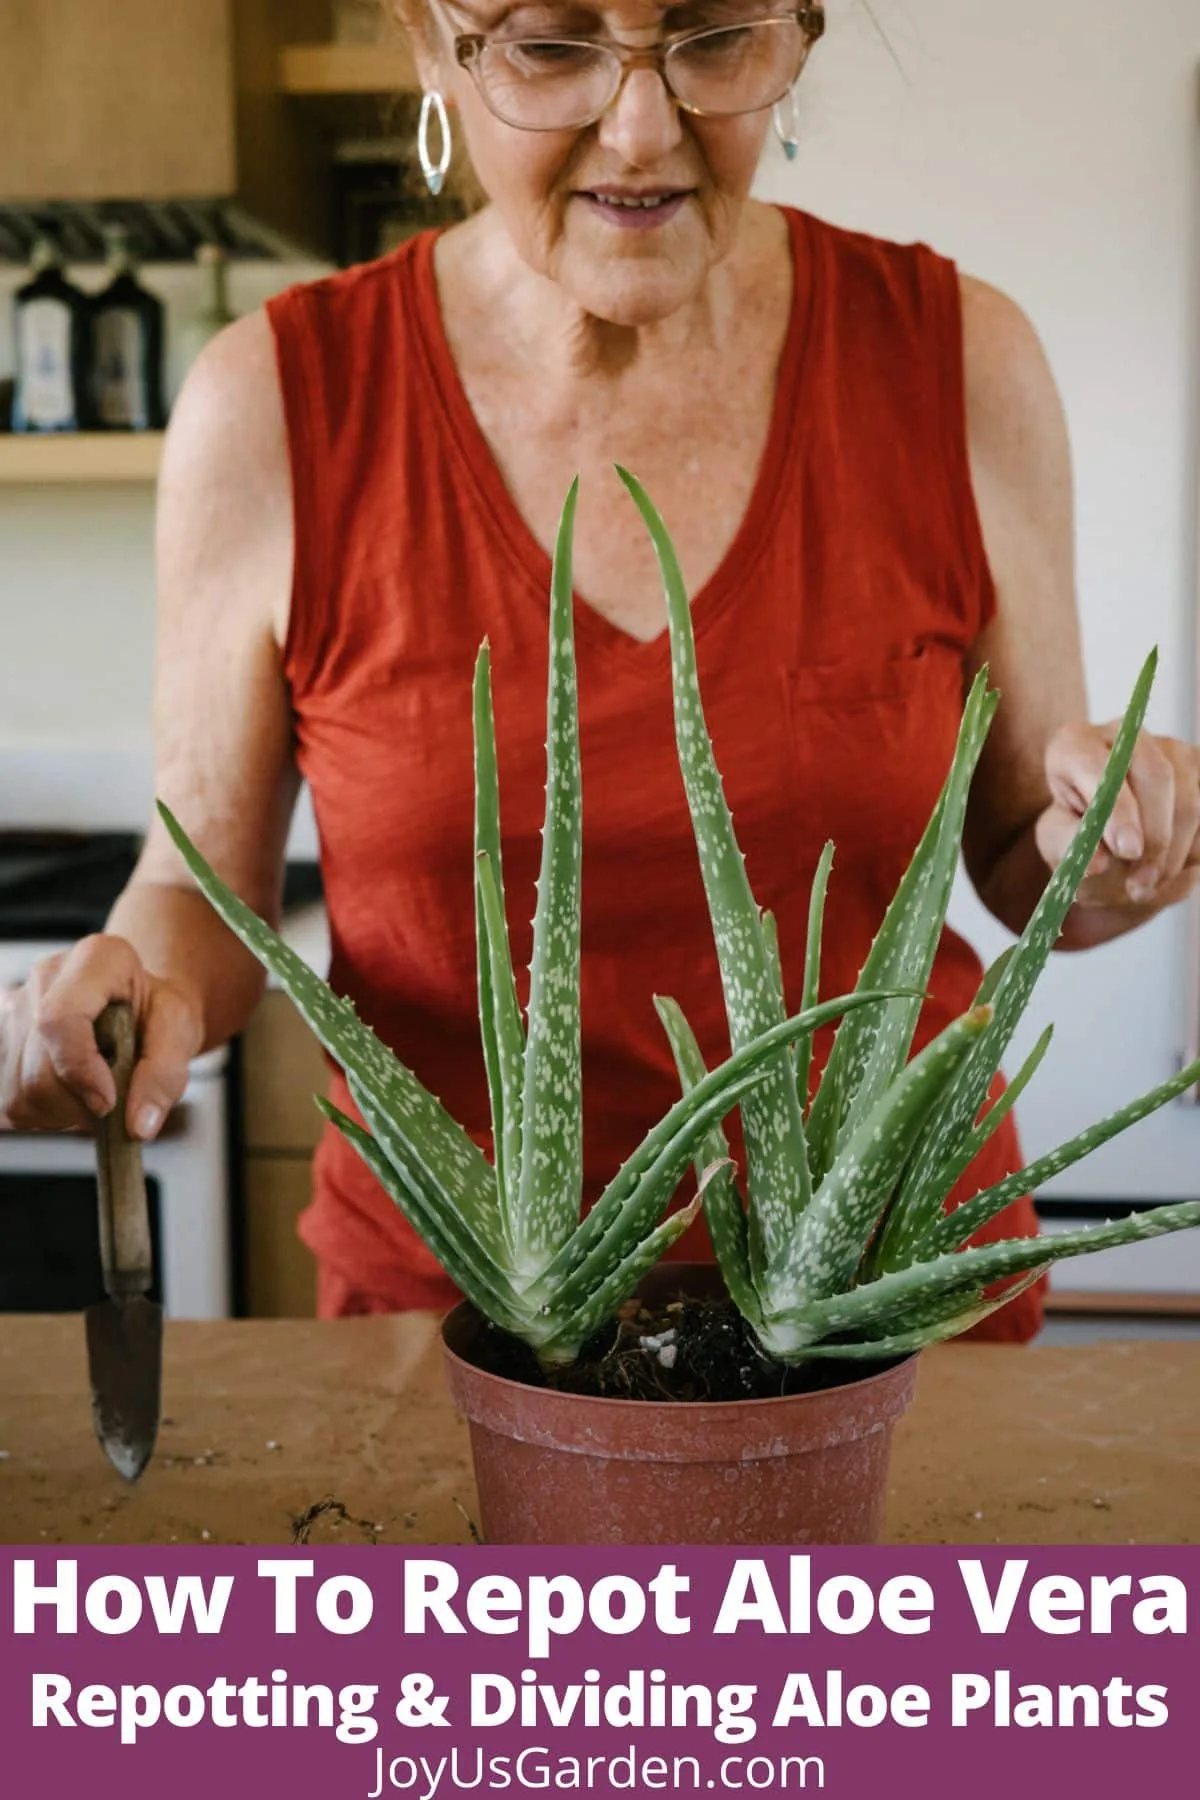
Now for the fun part! I put on my gloves and carefully took the aloe plant out of its old pot. I had to give it a little wiggle and a gentle tug, but it came out pretty easily. I was kind of surprised by how root-bound it was! The roots were all tangled up and circling around the bottom of the pot. This is a signal that you need to repot your aloe.

  • Put on gloves.
  • Gently removed the aloe from its old pot.
  • Observed the root-bound situation.

I gently loosened up the roots a bit with my fingers, trying not to damage them too much. Then, I put a layer of the new potting mix into the new pot and placed the aloe plant on top. I filled in the rest of the pot with more potting mix, making sure the base of the plant was at the same level as it was in the old pot.

  • Loosened the roots.
  • Added potting mix to the new pot.
  • Placed the aloe on top.
  • Filled in with more potting mix.

After I was done, I gave the plant a good watering. I made sure to water it until the water started to drain out of the bottom of the pot. And that’s it! My aloe plant is now happily settled into its new home. I learned from internet that overwatering will make its leaves soft and soggy. I’ll be sure to let the soil dry out completely before watering it again. And I learned that the aloe leaves are sensitive to burning, so I placed it in a spot that gets bright, indirect sunlight. Hopefully, it will thrive in its new pot!

  • Watered the plant thoroughly.
  • Placed the plant in bright, indirect light.

Some Extra Observations

I also noticed that my aloe plant had a few pups, or baby aloe plants, growing around the base. I decided to leave them attached to the mother plant for now, but I might separate them and plant them in their own pots later on. It was kind of a surprise to see how much the roots had filled up the old pot. It definitely confirmed that I made the right decision to repot it. Hopefully it won’t need to be repotted again for a while!

  • Noticed aloe pups.
  • Decided to leave them for now.
  • Confirmed repotting was the right move.

Overall, I’m pretty happy with how the repotting went. It was a lot easier than I thought it would be, and it feels good to give my aloe plant a little more room to grow. If you have an aloe plant that’s looking a little cramped, I definitely recommend giving repotting a try. It’s a simple way to keep your plant healthy and happy!

  • Happy with the repotting process.
  • Recommend repotting for cramped aloe plants.
nnxt

nnxt

Related Posts

Best Orchid Repotting Kits This Year Affordable Good Choices

Best Orchid Repotting Kits This Year Affordable Good Choices

by bloommelody
2025-07-24
0

Why I Needed to Repot My Orchids My old orchids were looking real sad last month. Roots coming out everywhere, leaves turning yellow, and zero blooms...

Need repot plants near me? Learn steps to choose a shop quick.

Need repot plants near me? Learn steps to choose a shop quick.

by jim
2025-07-14
0

Man, those plants looked miserable. Some leaves turned yellow, others drooped like they hadn’t slept in weeks. Couldn’t ignore it anymore – roots were probably bursting...

Repotting Figs Made Easy: Quick Guide for Healthier Plants!

Repotting Figs Made Easy: Quick Guide for Healthier Plants!

by nnxt
2025-07-11
0

Okay folks, grab your gardening gloves because today I’m spilling the dirt—literally—on repotting my fiddle leaf fig. Felt like it needed a bigger home, and I...

How to Repot Figs Step by Step: Easy Guide for Beginners

How to Repot Figs Step by Step: Easy Guide for Beginners

by jim
2025-07-10
0

Getting Ready to Repot I saw my fig plant getting too big for its pot. The leaves looked kinda sad and roots were poking out the...

How to Repot Ficus Step by Step Guide for Beginners

How to Repot Ficus Step by Step Guide for Beginners

by nnxt
2025-07-03
0

Getting Everything Ready First I grabbed my messy Ficus elastica that’d been sitting in the same ugly plastic pot for like two years. The poor guy...

Next Post
5 blade scissors: Are they worth it? A quick guide!

5 blade scissors: Are they worth it? A quick guide!

Shovel Gardening Tools: Find the Best Deals on Essential Garden Shovels and How to Use Shovel Gardening Tools for Various Garden Projects.

Shovel Gardening Tools: Find the Best Deals on Essential Garden Shovels and How to Use Shovel Gardening Tools for Various Garden Projects.

Raised Plant Stands Ideas: Simple Tips to Elevate Your Indoor Garden!

Raised Plant Stands Ideas: Simple Tips to Elevate Your Indoor Garden!

CATEGORIES

  • Fertilizing
  • Flower Fertilizers & Pesticides
  • Flowerpot
  • Flowers & Plants
  • Gardening Gloves
  • Gardening Knowledge
  • Gardening Scissors
  • Gardening Stand
  • Gardening Tools
  • Light
  • Pests & Diseases
  • Pruning
  • Repotting
  • Shovel
  • Soil
  • Temperature
  • Watering
  • Watering Can

RECOMMENDED

Choosing the Right Grow Light Stands for Your Plants
Light

Choosing the Right Grow Light Stands for Your Plants

2024-12-08
Does a fake animal to scare squirrels actually work long term? Real user reviews on their effectiveness.
Gardening Knowledge

Does a fake animal to scare squirrels actually work long term? Real user reviews on their effectiveness.

2025-05-02
Enchanting Floral Gardening: Nature's Palette

Gardening is actually easy

pexels-photo-931179
pexels-photo-85773
Elevating Your Gardening Stand: Cultivating a Sanctuary of Wellness and Harmony
roses-bouquet-congratulations-arrangement-68570
pexels-photo-298246
u=1477108710,1302668665&fm=253&fmt=auto&app=138&f=JPEG
pexels-david-bartus-43782-714918
94339887ba0b48118d17e18d1112938b
17071874890767616772_3_ainote_new
1704070288593363160_7_ainote_new
  • About
  • Advertise
  • Privacy & Policy

© 2025 Bloom Melody - https://www.bloommelody.com

No Result
View All Result
  • Flowers & Plants
  • Gardening Knowledge
    • Light
    • Watering
    • Fertilizing
    • Pruning
    • Soil
    • Repotting
    • Temperature
  • Pests & Diseases
  • Flower Fertilizers & Pesticides
  • Gardening Tools
    • Flowerpot
    • Gardening Scissors
    • Gardening Gloves
    • Shovel
    • Watering Can
    • Gardening Stand

© 2025 Bloom Melody - https://www.bloommelody.com