
Yesterday I decided to finally tackle mounting my shovel on the roof rack after putting it off for weeks. Kept banging around in my trunk every time I hit a bump, drove me crazy. Here’s exactly how I did it step by step.
Gathering My Stuff
First I dug around in my garage for parts. Grabbed my old snow shovel – not the heavy metal one but a lighter plastic one. Found these rubber-lined U-bolts left over from a bike rack project. Also fished out a roll of duct tape and some old bungee cords. Total cost? Zero bucks since I used junk I already had.
Test Fitting Disaster
Started by just laying the shovel flat on the roof rack crossbars. Big mistake. Soon as I drove around the block at 30mph, that thing slid sideways like butter in a hot pan. Heard this awful scraping noise and pulled over to see the handle hanging off the side. That’s when I realized I needed to strap it vertically.
Tried using just bungees first – wrapped four around the handle and through the rack. Worked okay till I hit highway speeds. Then the whole shovel started doing this weird vibration dance. Sounded like angry bees trapped in my roof rack.
U-Bolt Solution
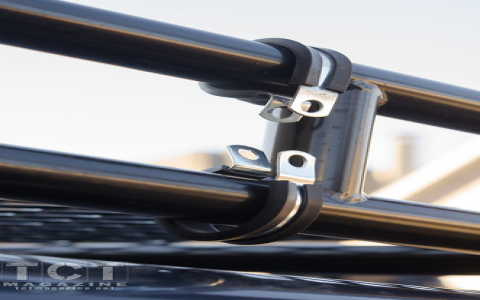
Took everything off and started over. Here’s what actually worked:
- Took two U-bolts and lined them with duct tape so they wouldn’t scratch the rack
- Hooked them around the shovel handle near the top part
- Used an old wrench to tighten them real good – tight enough I couldn’t wiggle the handle
- Still used two bungees around the shovel blade bottom as backup
Test Drive Success
Took it for a proper test this time – drove down that bumpy dirt road near the river. No rattling, no sliding, nothing. Even took a sharp turn on purpose to see if it would shift. Solid as a rock. Whole install took maybe 20 minutes after I quit messing around with bad ideas.
My big lesson? Always go vertical with shovels and always double-secure. Those little U-bolts did way better than I expected. Best part? Didn’t spend a dime on fancy mounting kits. Just used what was in my garage.


